How to Organize Interior Design Inspirations and Files
If you are en route to becoming an interior designer, you should know that to get the project started, file organization is the most challenging yet joyful of a design project.
While working with a budget or opinionated clients can be stressful, especially when you’re stuck retracing your steps and there’s nothing worse than being disorganized as disorganization leads to a drop in productivity.
So, how to organize interior design inspirations and why do you need to?
- Start a systematic way of cataloging all your resources so when the time comes, you can immediately find what you’re looking for.
- Not only will the organization lead to better use of your time, but it will also enhance your relationship with your clients.
- When you’re organized, you show your clients that they can trust you to get the job done professionally, on time, and with no surprises.
Let's follow this step by step to becoming a more organized designer!
Step 1 - Have a Place for Storing Your Design Ideas
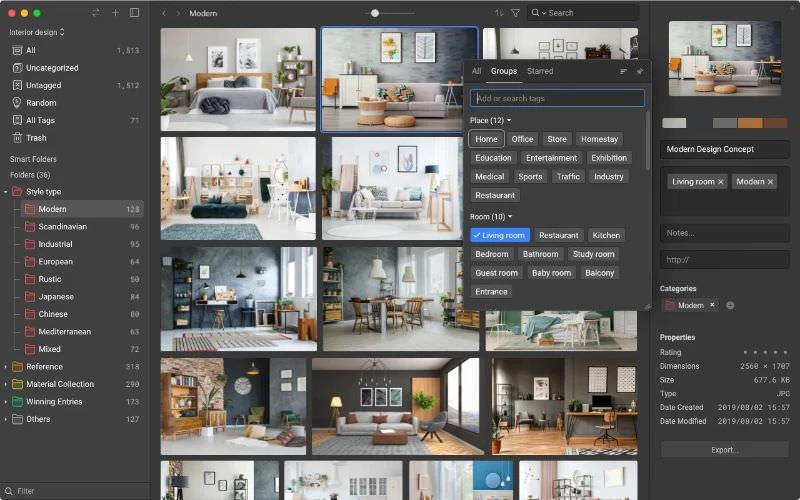
image from Pixabay
Before making ideas into production. You probably alternate between browser bookmarks, handwritten notes, clipped magazine images, saved photos on your computer, a collection of Instagram faves, and several Pinterest boards.
The problem with having so many different places to house your inspiration is that trying to find it again can be a pain in the ass. To improve productivity, it’s crucial that you work from a central digital design library. Otherwise, you’ll lose a lot of time in hopping from one app to another.
Our favorite solution is to use Eagle to gather all of your design ideas into one easy-to-access digital library.
video from Eagle
With Eagle, you can
- find furniture pieces and accessories from any website and then add them directly to your individual interior design projects using a Chrome plugin.
- Whether is a link or an image you can easily save it all in one place.
- Once you’ve added them, you can then organize them even further. Add inspirations to a client’s project and assign them to specific room types (i.e., living room, den, master bathroom).
Step 2 - Start By Organizing What You Already Have
Organizing your digital design space begins with sorting what you’ve already collected and saved. To be honest, organizing and categorizing your current resources will probably be the toughest task, but it’s necessary.
To start, grab all of your design resources from the web bookmark and your hard drive. drag them all into Eagle.
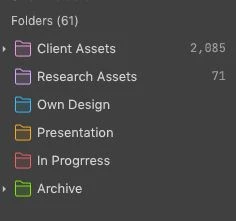
You may use the following folder for an example:
- Client Assets
- Research Assets
- Own Designs
- Presentation
- In Progress
- Archive
Step 3 - Add the Details
After you’ve added files to Eagle, it’s time to write in the details. We recommend that you adding keywords and other important product-specific details (such as color, shape, manufacturer, etc.) will make it easier for you to find these products through search functions. You can also add your personal notes to your saved images, too!
For example this pink style baby pink bathroom:
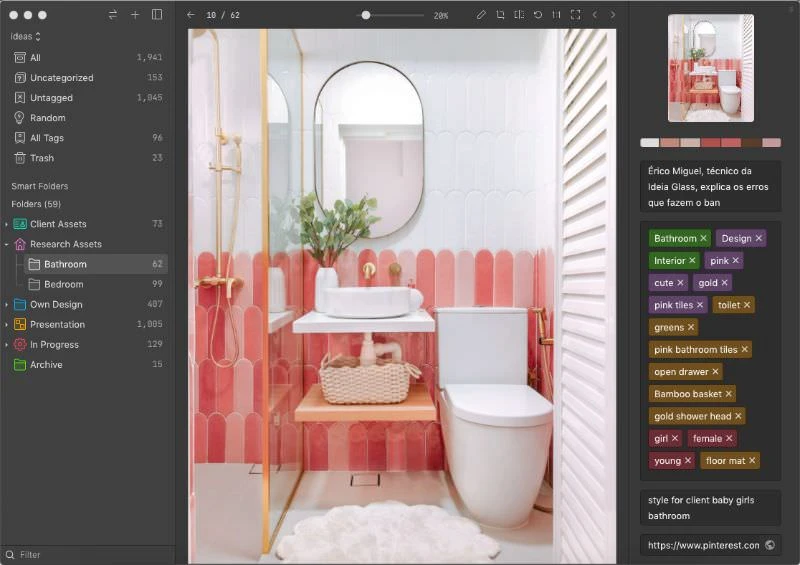
image made from Eagle
Step 4 - Keep the Inspirations Coming
Inspiration comes in many forms. and you cannot stop keeping up with it. Make hunting for inspiration a part of your daily schedule instead of spontaneous activity. This will automatically translate into a more organized approach to design. With Eagle App, you can just browse as you save through the website with its extension plugin.
video from Eagle
Step 5 - Take 5 mins At the End of the Day
One of the most important things you can do to organize your digital interior design space is to never stop the organization, or else once it piled up it's gonna be a huge headache. Schedule 5 mins a day before ending your work to finish and tidy up all your thoughts.

image from Pixabay
Related Posts