
7 Tips for Setting Up Eagle App System Preferences
Do you want to customize your Eagle App? There are many useful settings hidden in Eagle App system preferences, with these settings you will be able to explore your design files easier and happier, and more importantly, make Eagle App experience enjoyable!
How to find Eagle App system preference
First, to access Eagle App Preference, find the menu bar and click “Eagle” to find the Preferences window.
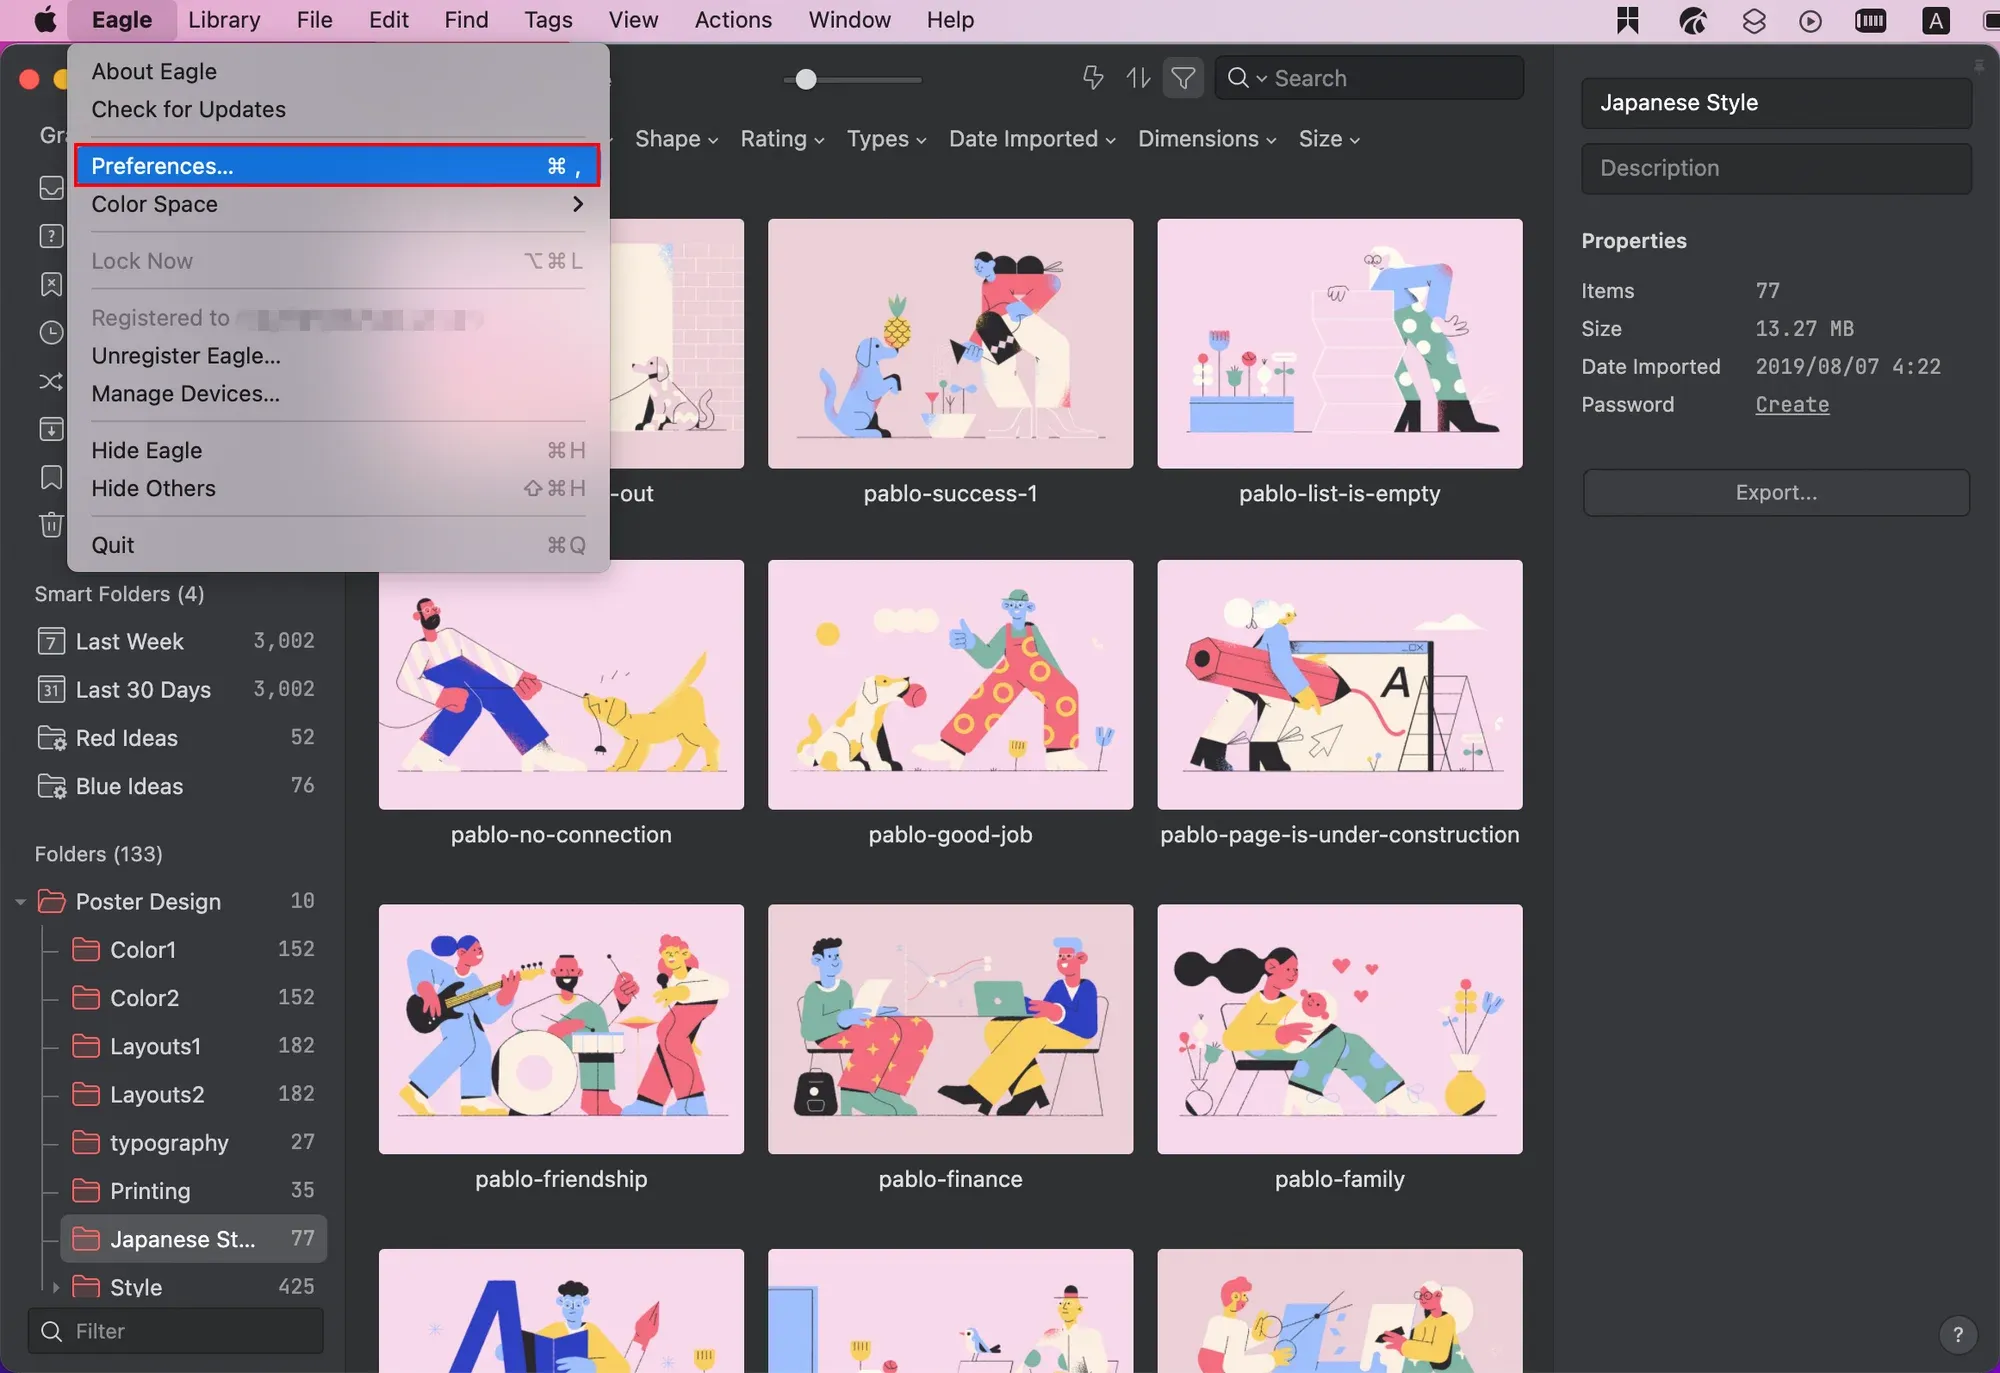
Here you can personalize Eagle App and set various user preferences.
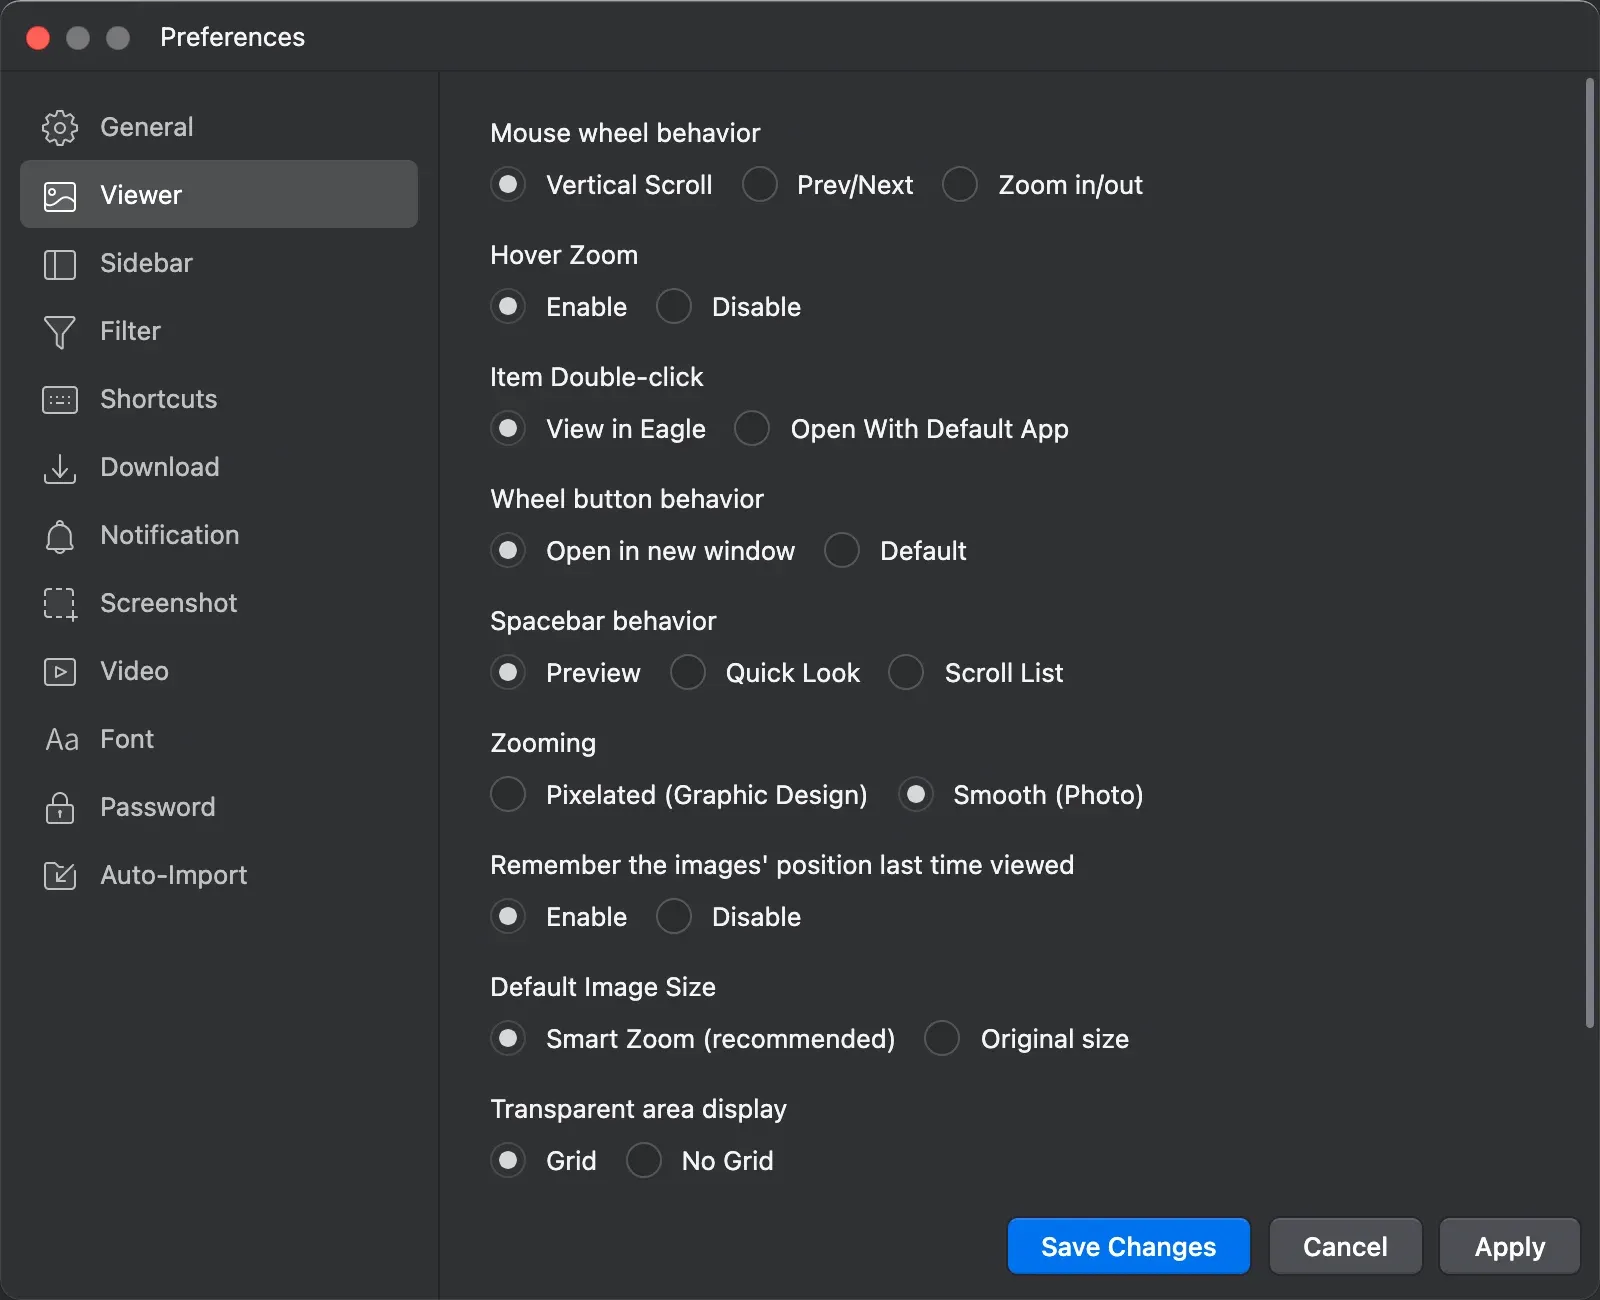
Note: After changing each setting, remember to click “Apply” and then click “Save Settings” to ensure that your changes take effect.

01 Screenshot setting
If you’ve installed Eagle's extension, then you will definitely find many useful screenshot features:
- Capture Area — Select any area of the page to take a screenshot (or element)
- Capture Visible — Take a screenshot of the current screen display
- Capture Page — Take a screenshot of the entire website
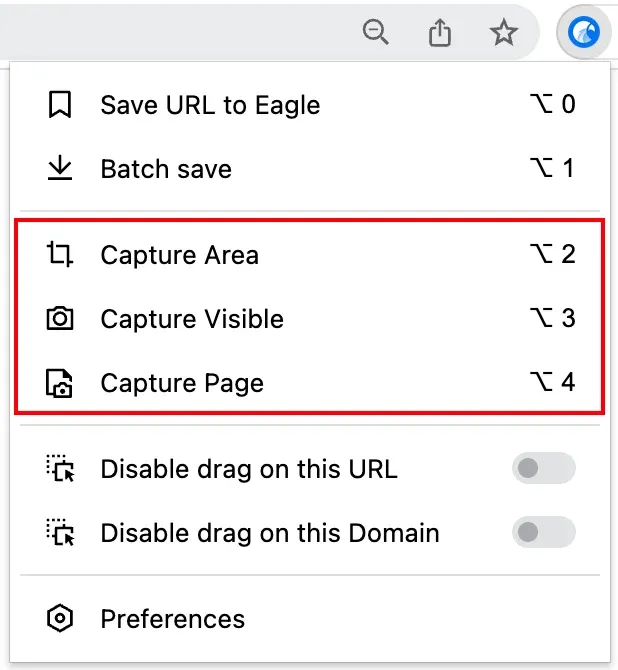
In Preferences, you can set the following screenshot preferences:
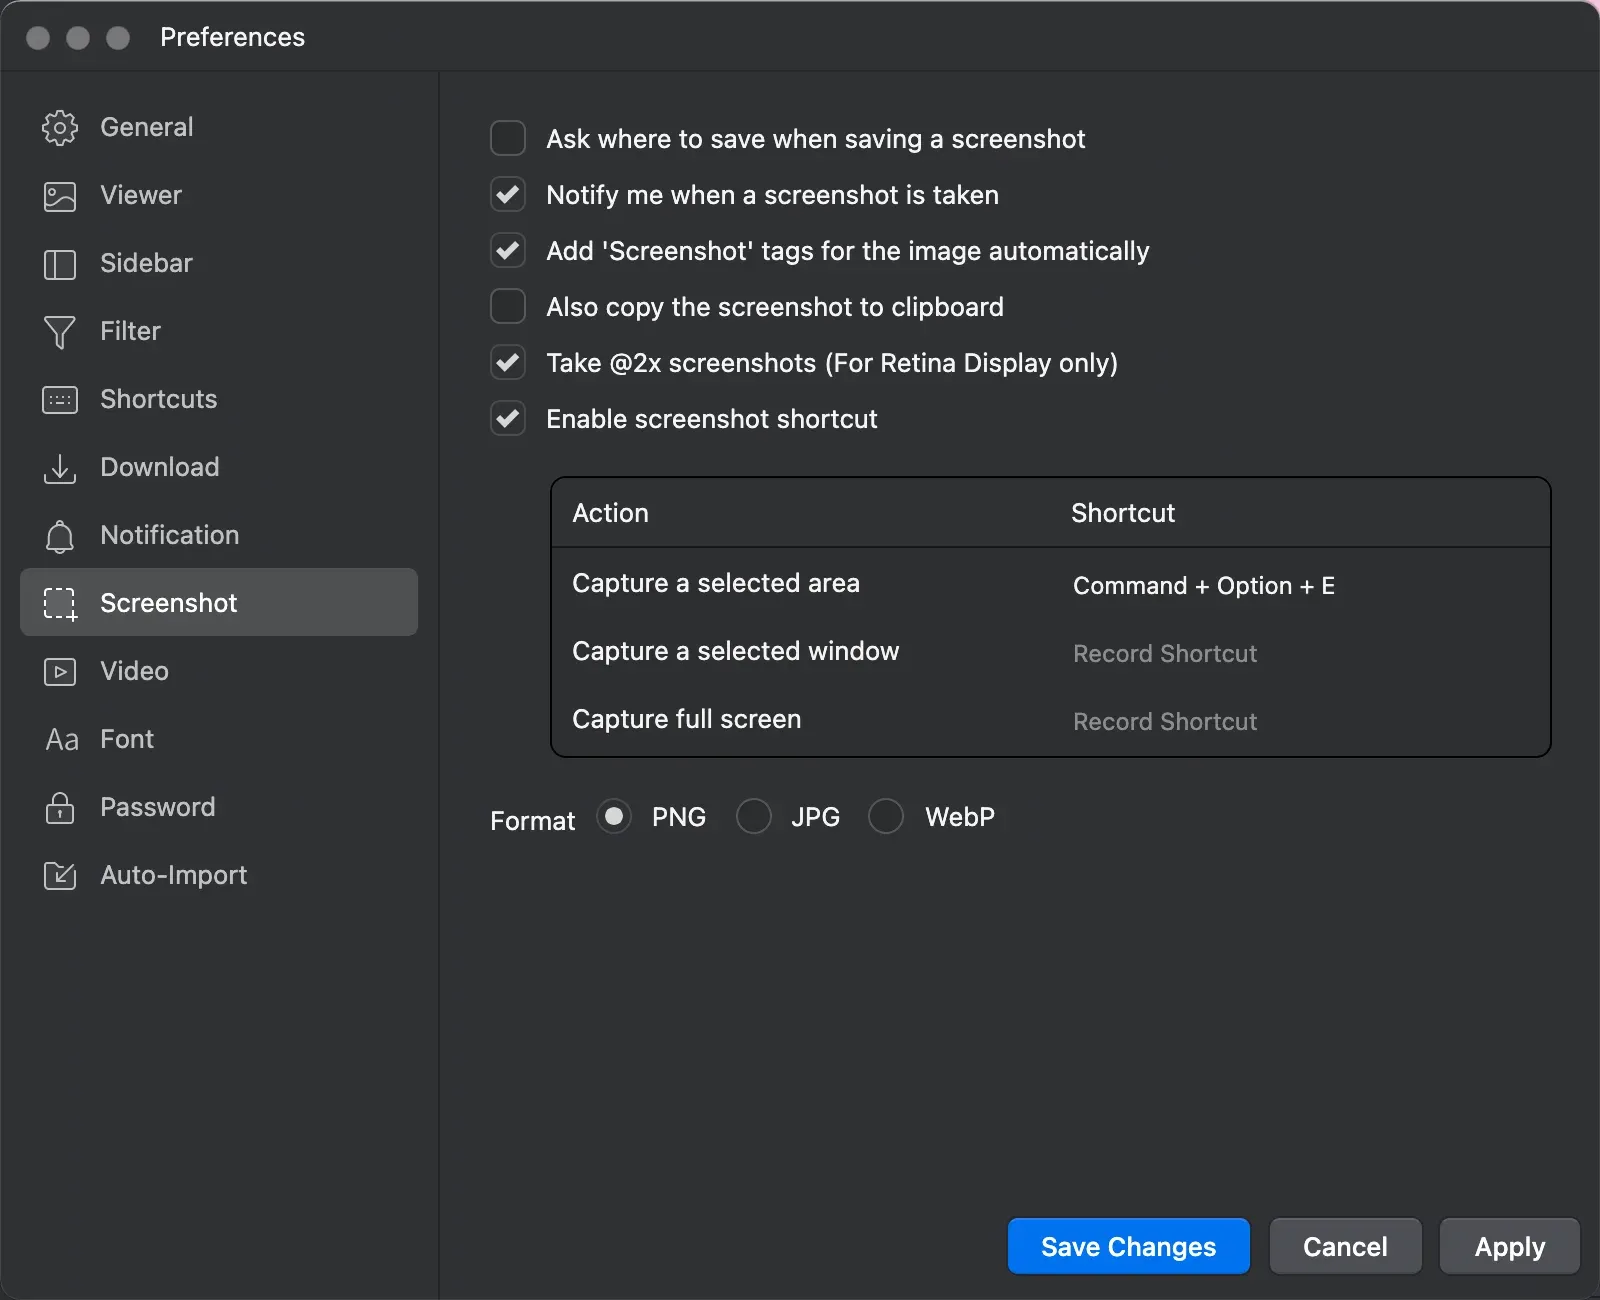
It is recommended to enable the following 4 screenshot-related settings:
- Add “Screenshot” tags for the image automatically — Every time you take a screenshot, Eagle will add a tag ”screenshot” for you to search or find it easier later on.
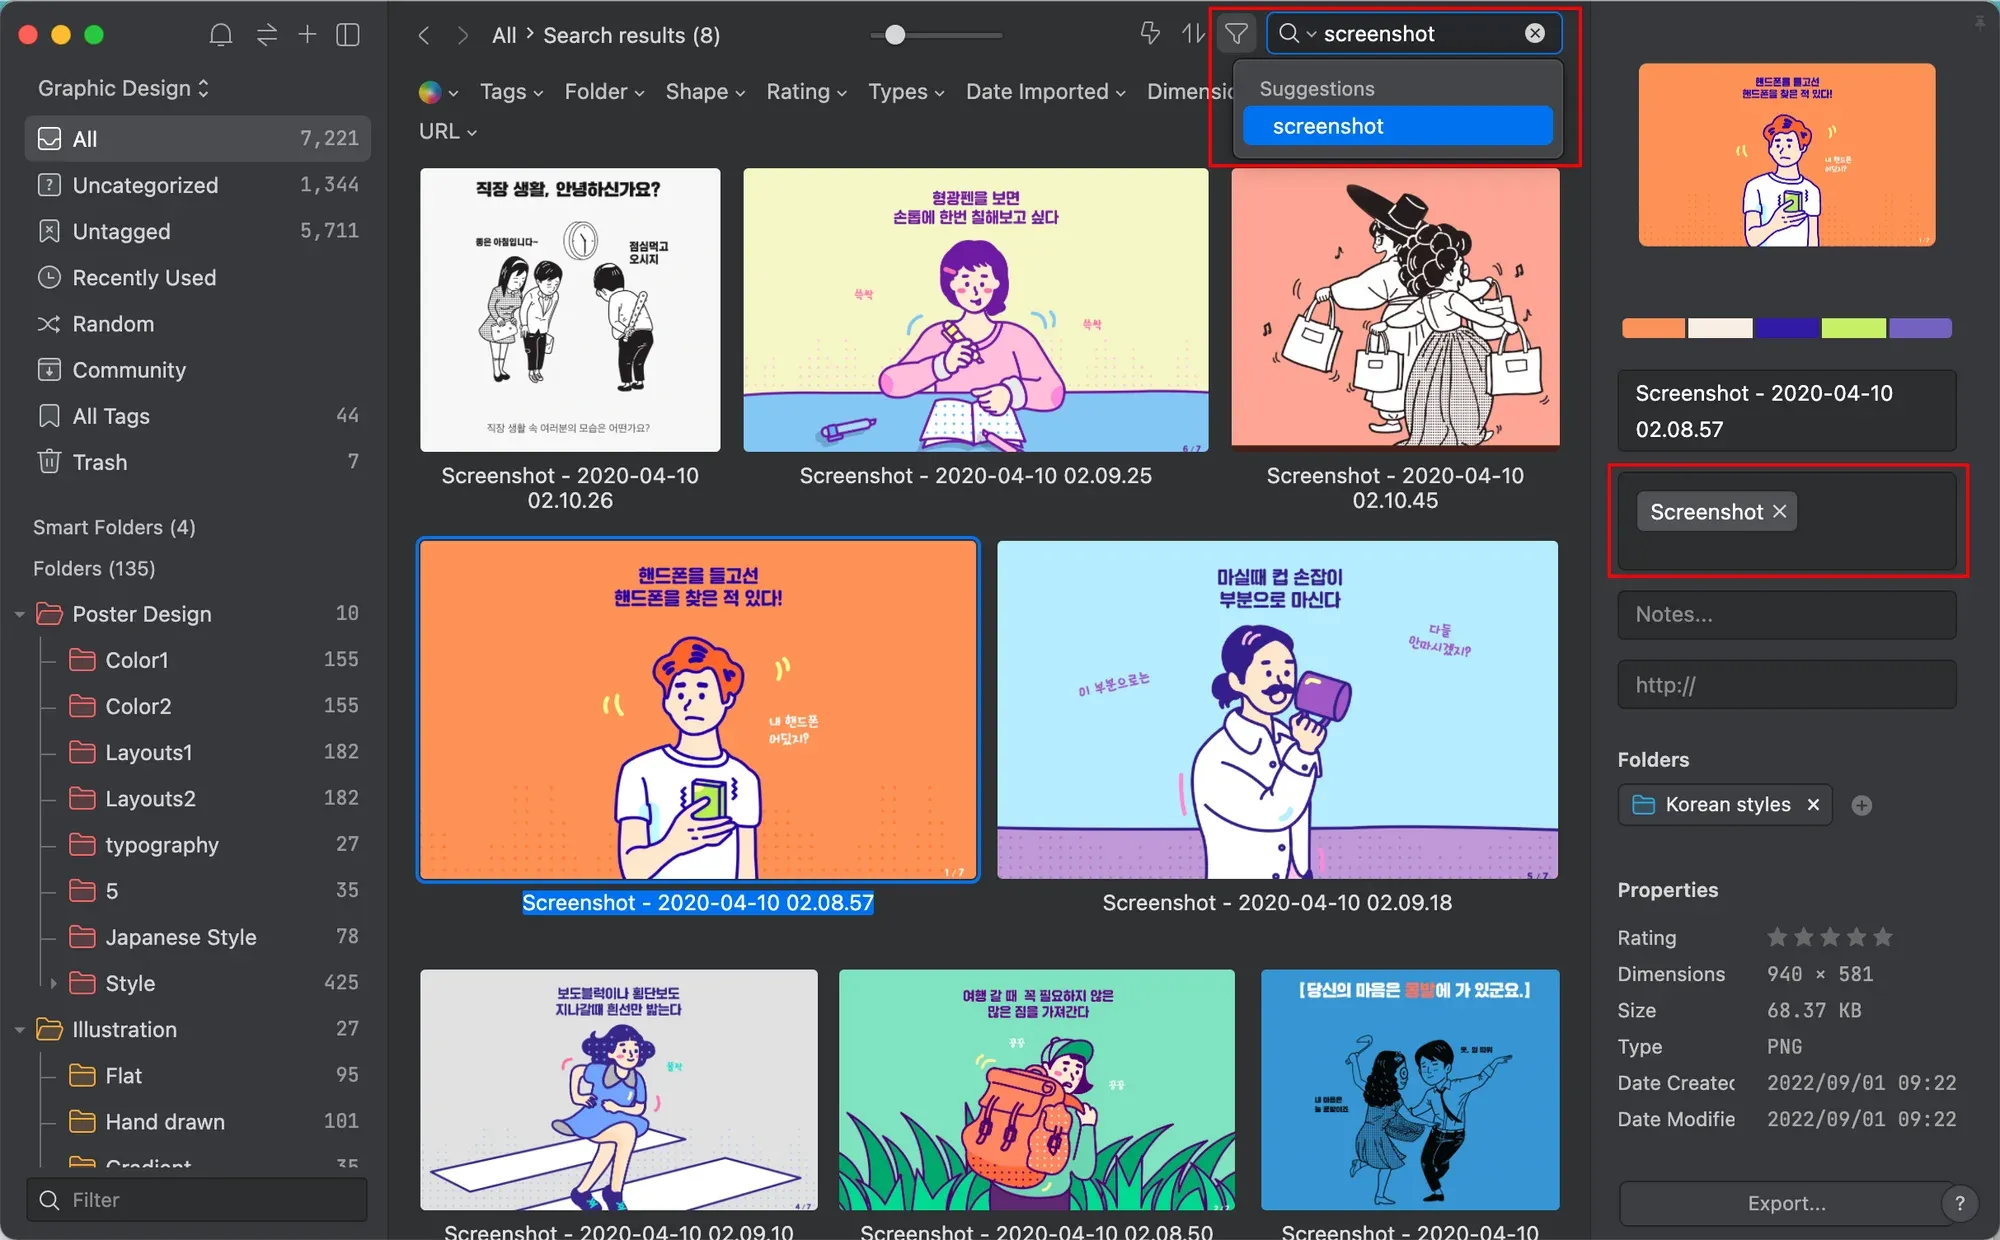
- Copy the screenshot to clipboard — It will be very convenient to paste and share directly with colleagues and friends.
- Take @2x screenshots (For Retina Display only) —This will enable Retina quality screenshots with better image resolution. However, do note that the corresponding screenshot file sizes will be larger. If you want smaller file sizes, you may change the image format to WebP.

- Enable screenshot shortcut — Set your favorite shortcut to personalize your screenshot workflow.
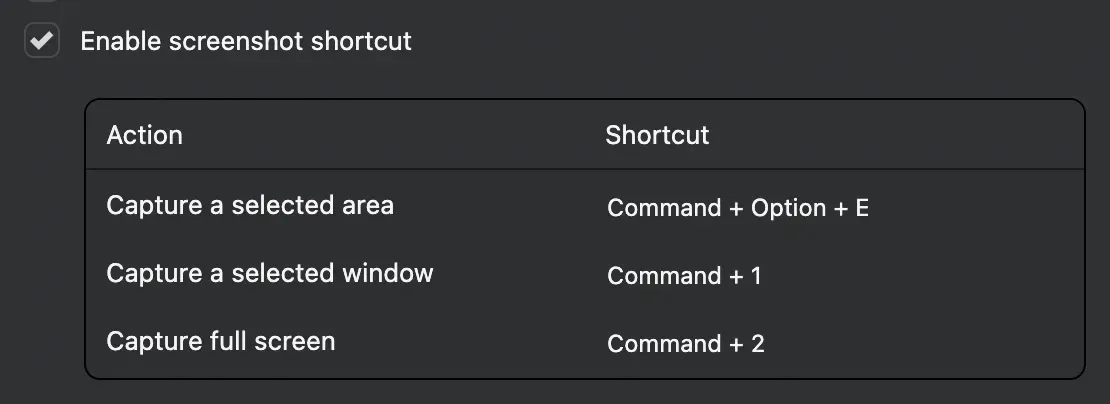
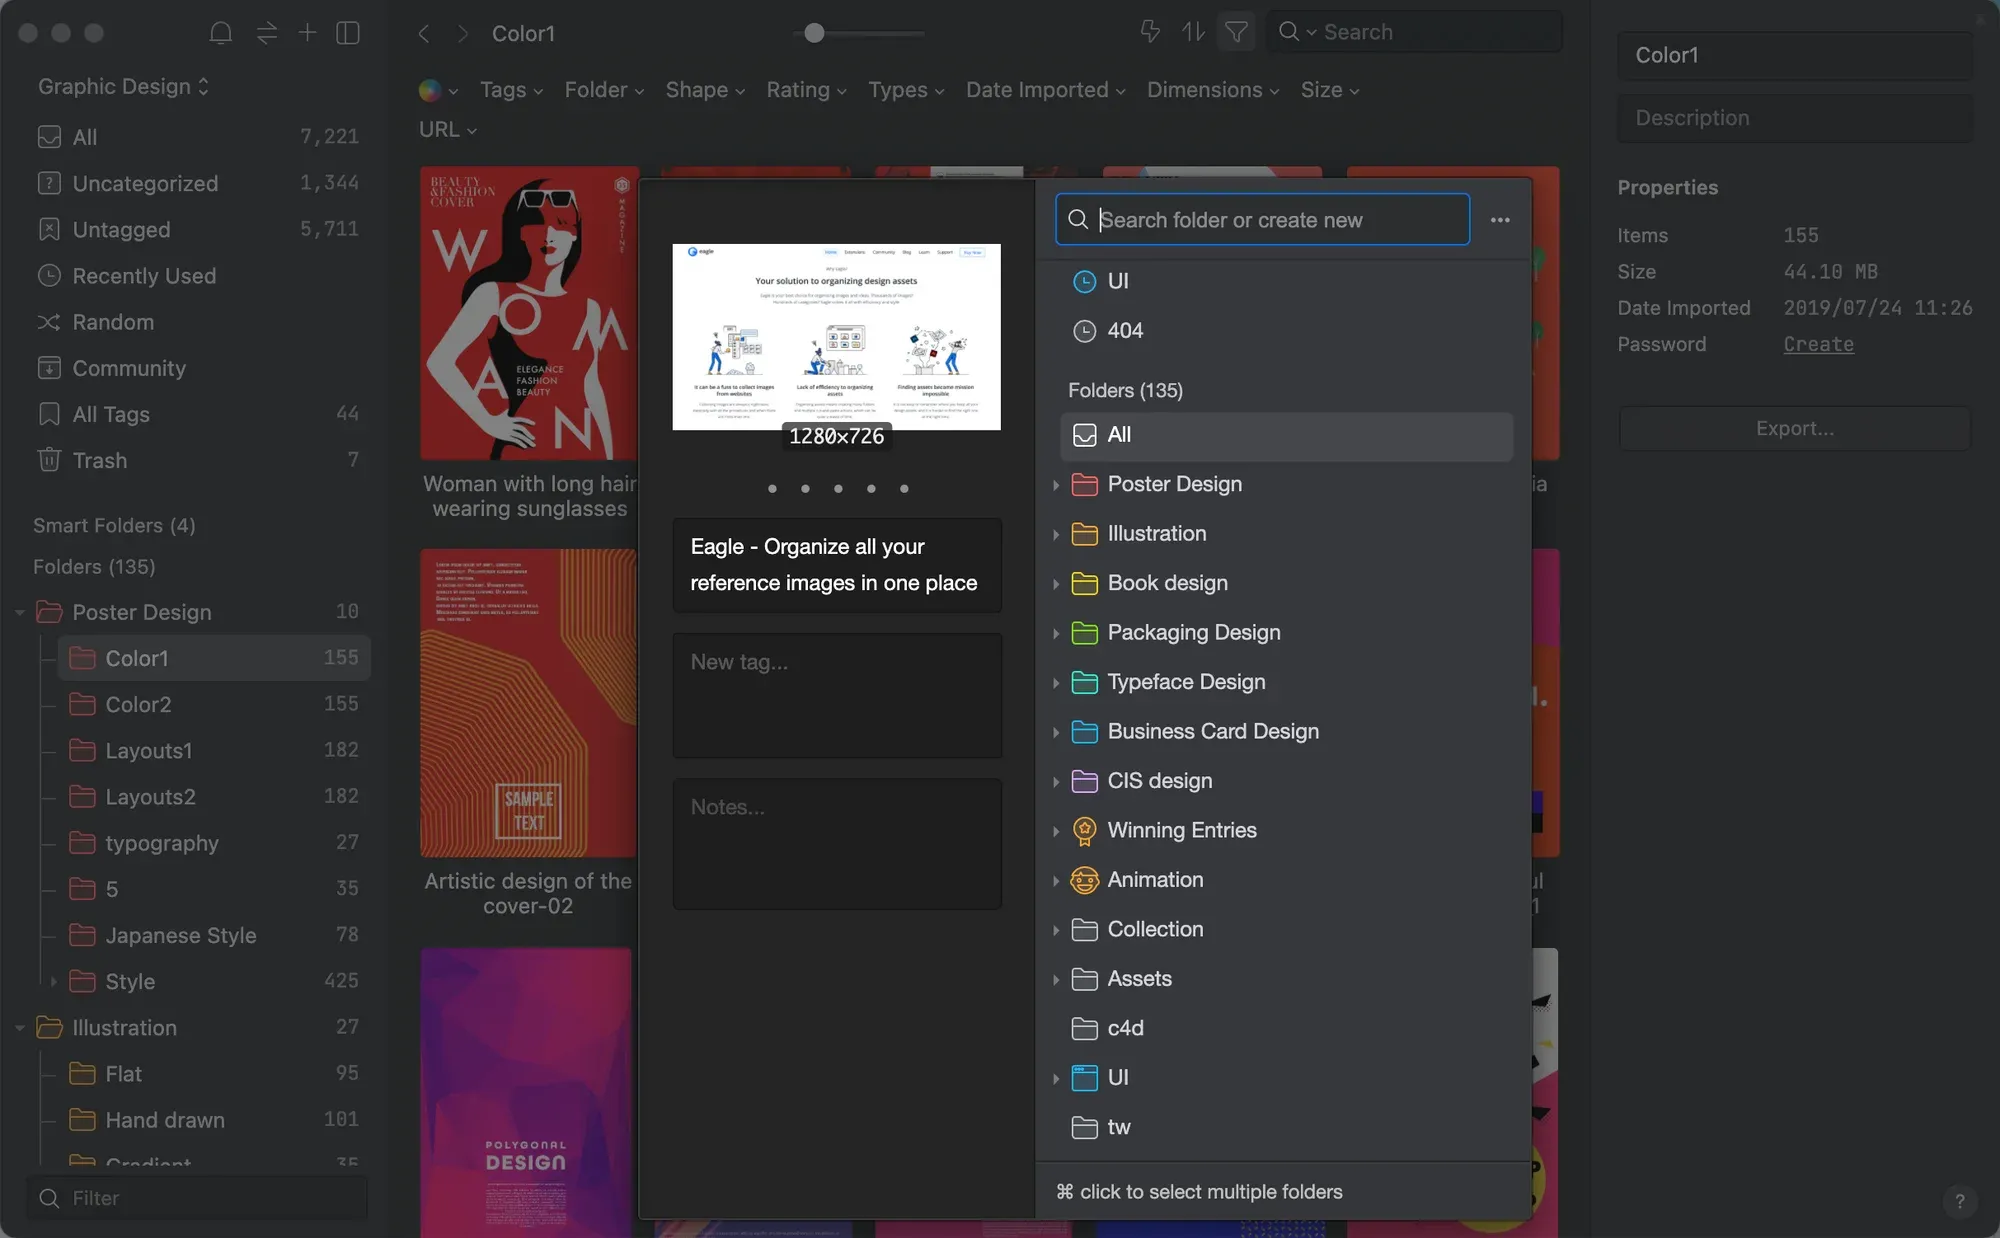
You can also enable “Ask where to save when saving a screenshot”, this will activate a pop-up window every time you take a screenshot. You can categorize your images on the screen directly.
Of course, if you prefer classifying all your images after taking all the screenshots, it is recommended not to enable this.
02 General settings
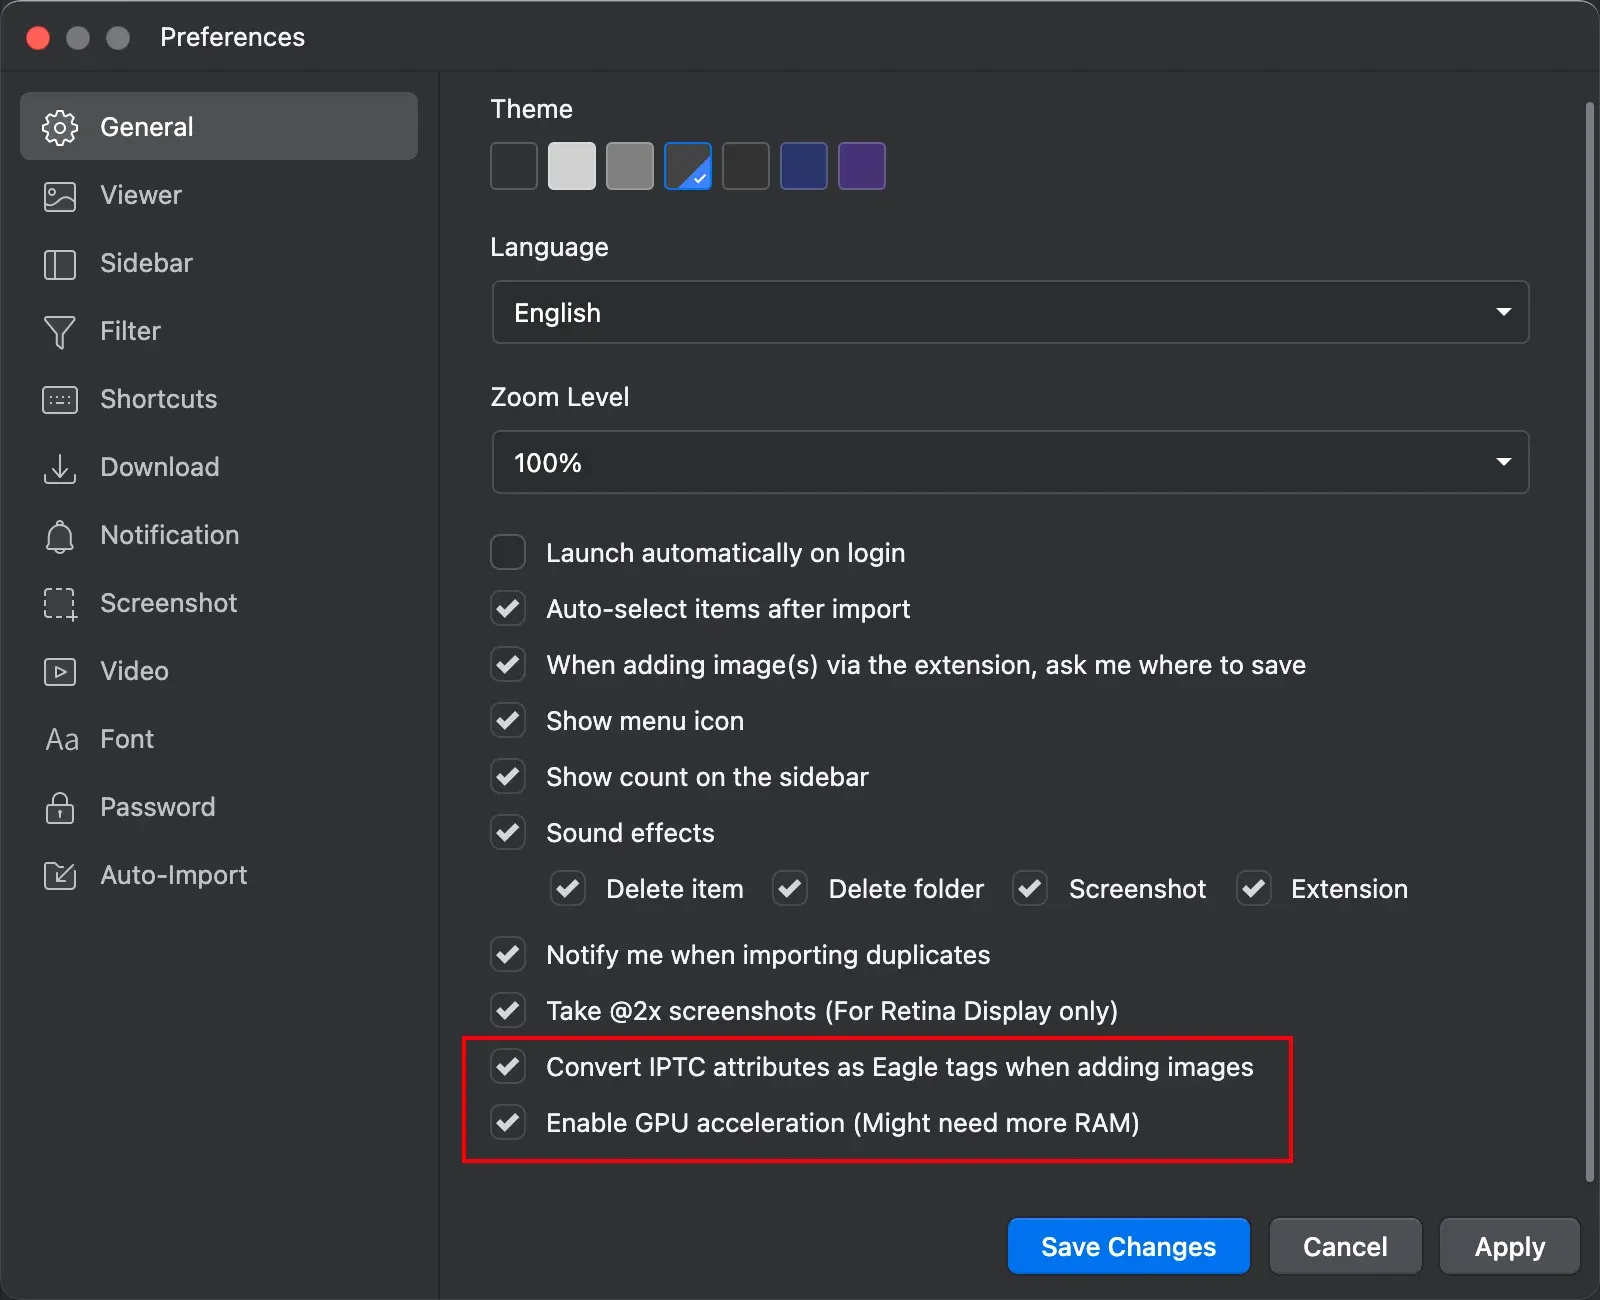
You are allowed to customize your Eagle color theme
Adjust the “Zoom Level” to change the text and icon sizes according to your preferred reading size.
In addition, the following settings can be enabled when needed:
- Convert IPTC attributes as Eagle tags when adding images — When importing a picture, the IPTC keyword is automatically used as the picture label. This means some pictures that have built-in labels Eagle will identify and automatically label them as tags for you.
Read more: How to import images with IPTC attributes?
- Enable GPU acceleration — It will be smoother to view all the ultra-high-definition image details with zoom in and out.
03 Viewer
In Viewer setting, apart from some general image viewing options as followings:
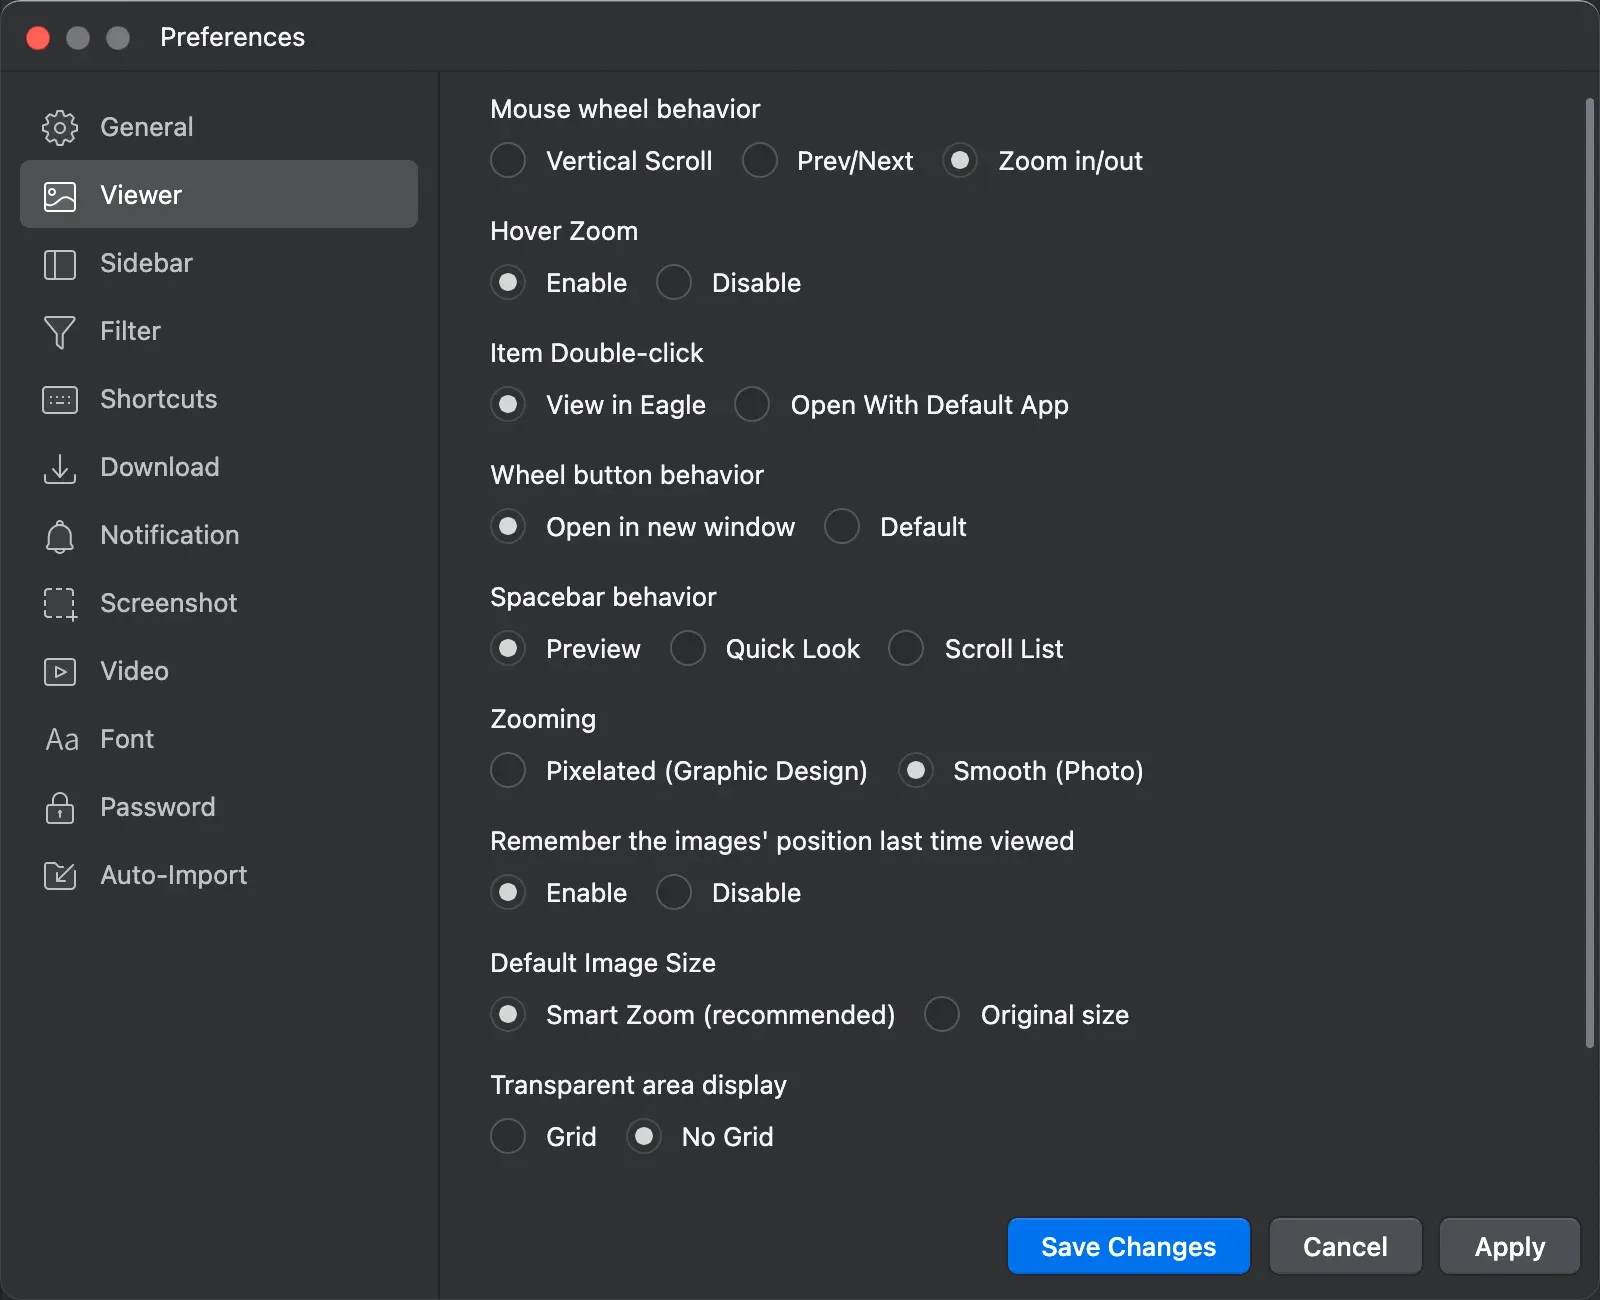
There are 4 helpful settings that need to be highlighted for a better user experience:
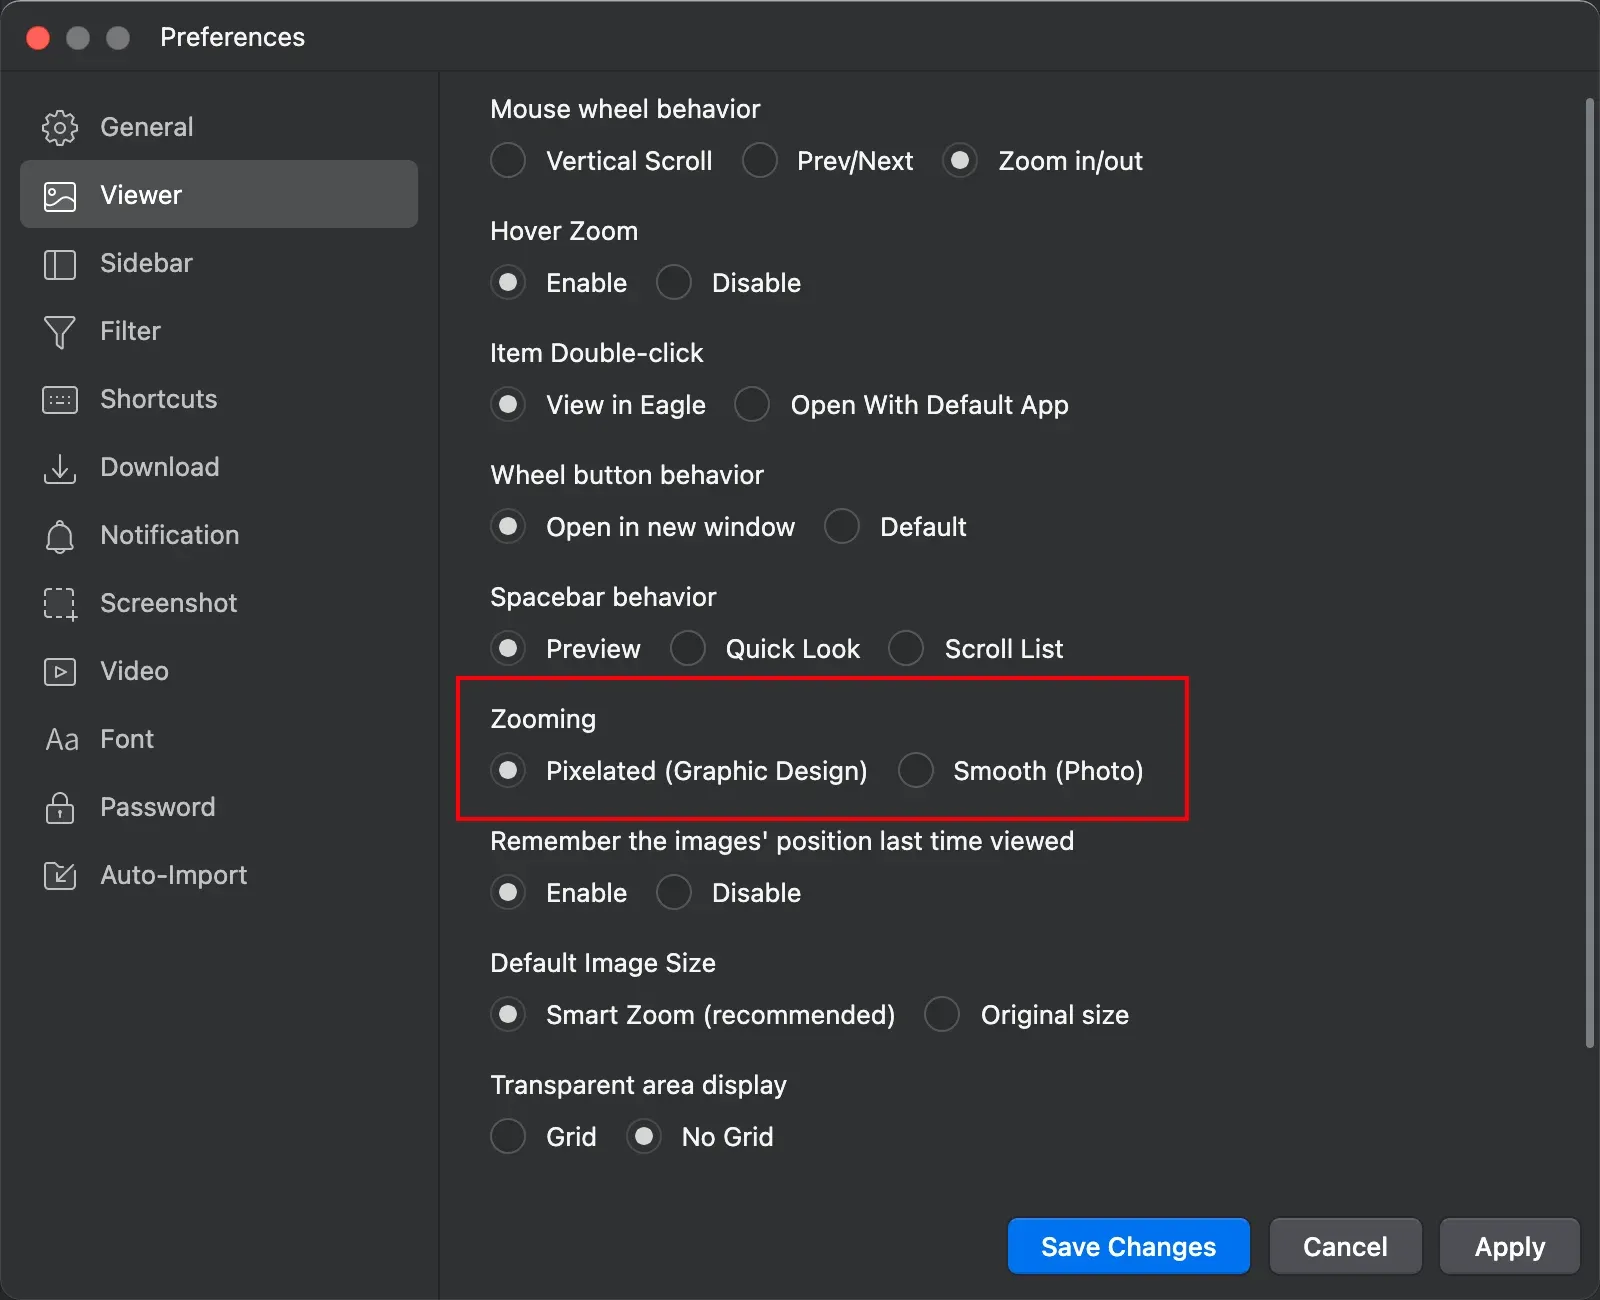
1. Zoom in on details
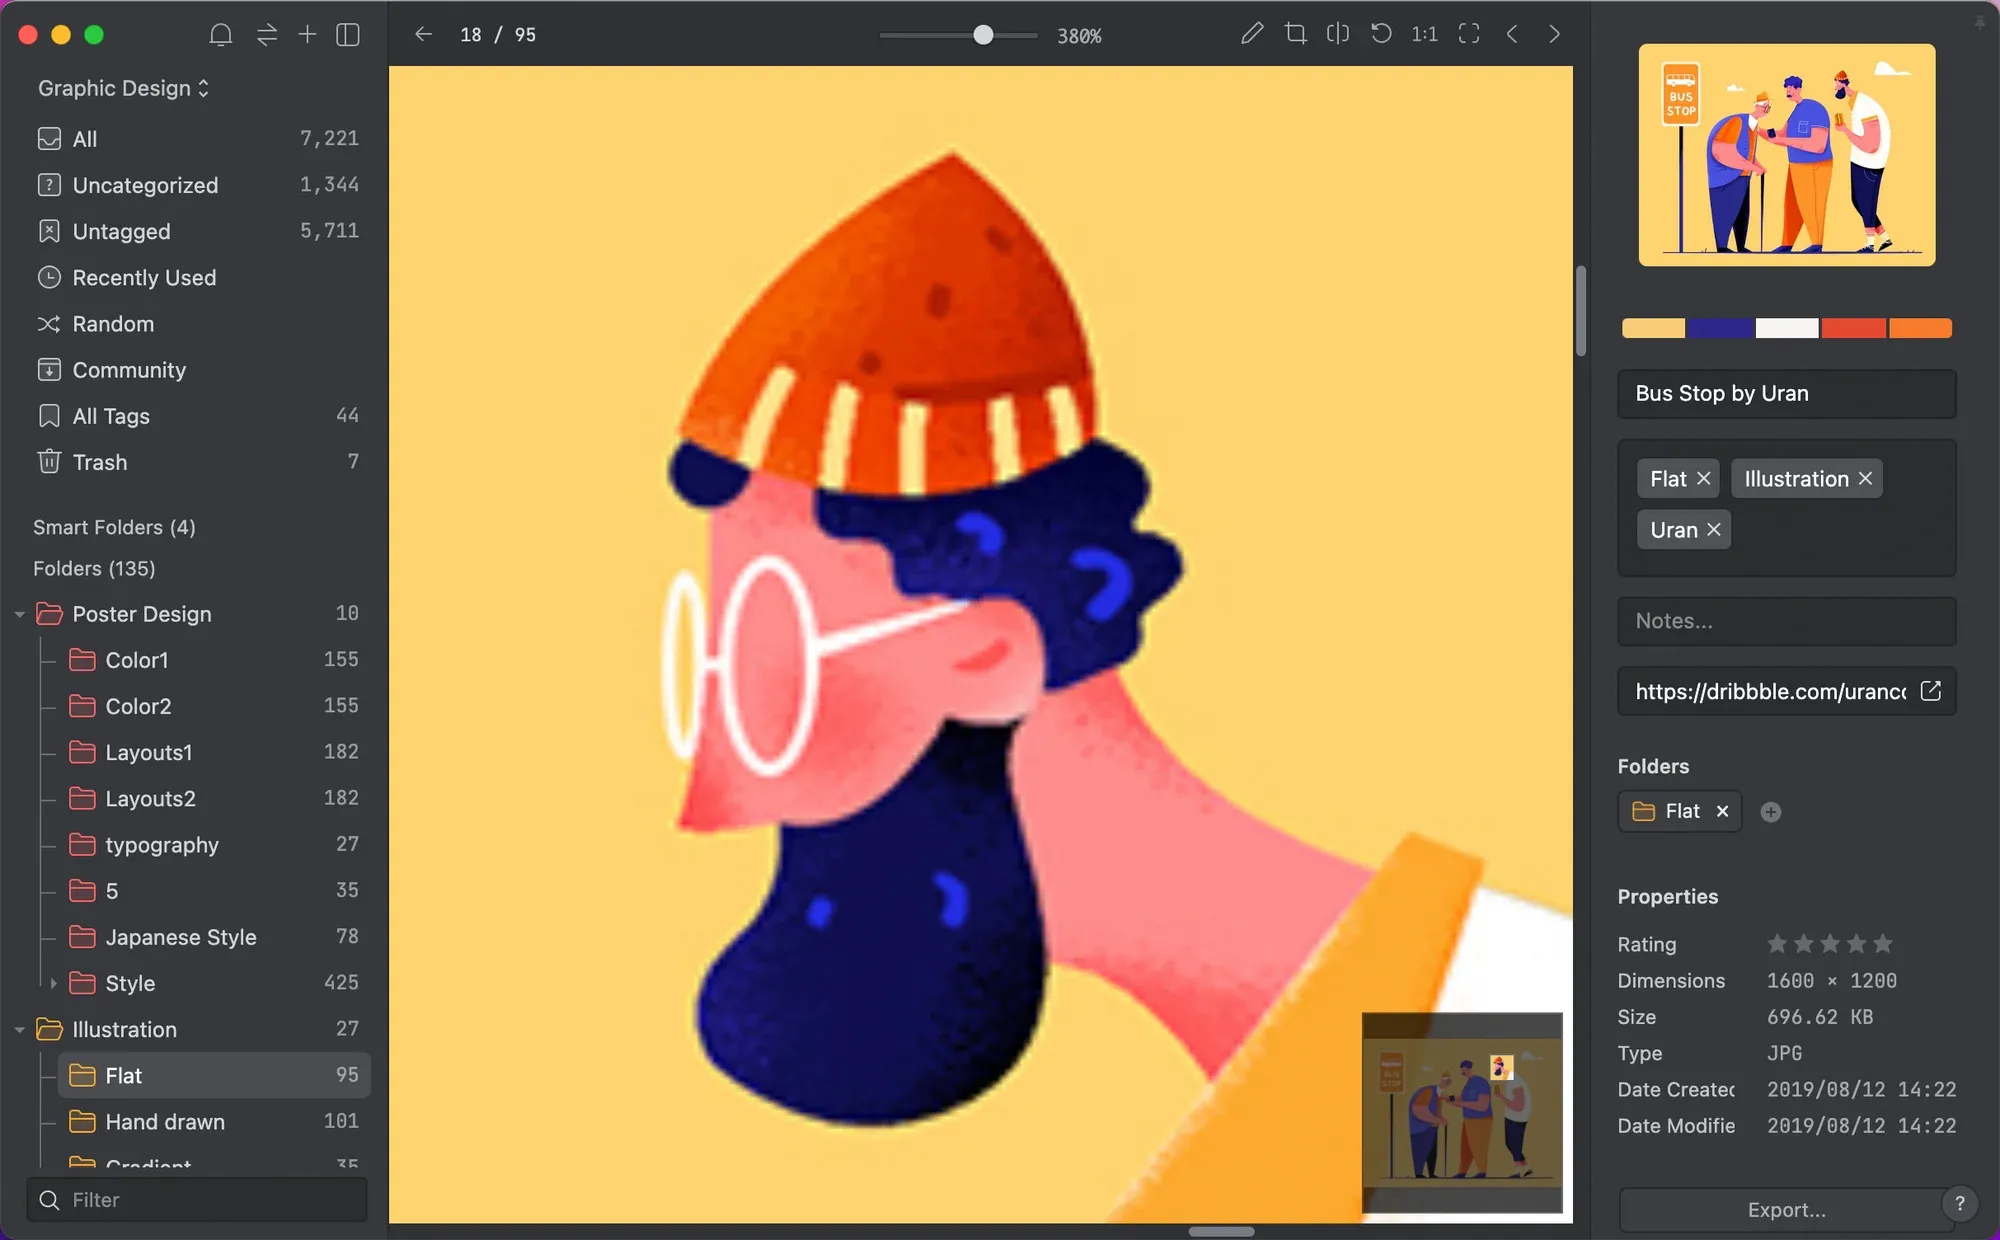
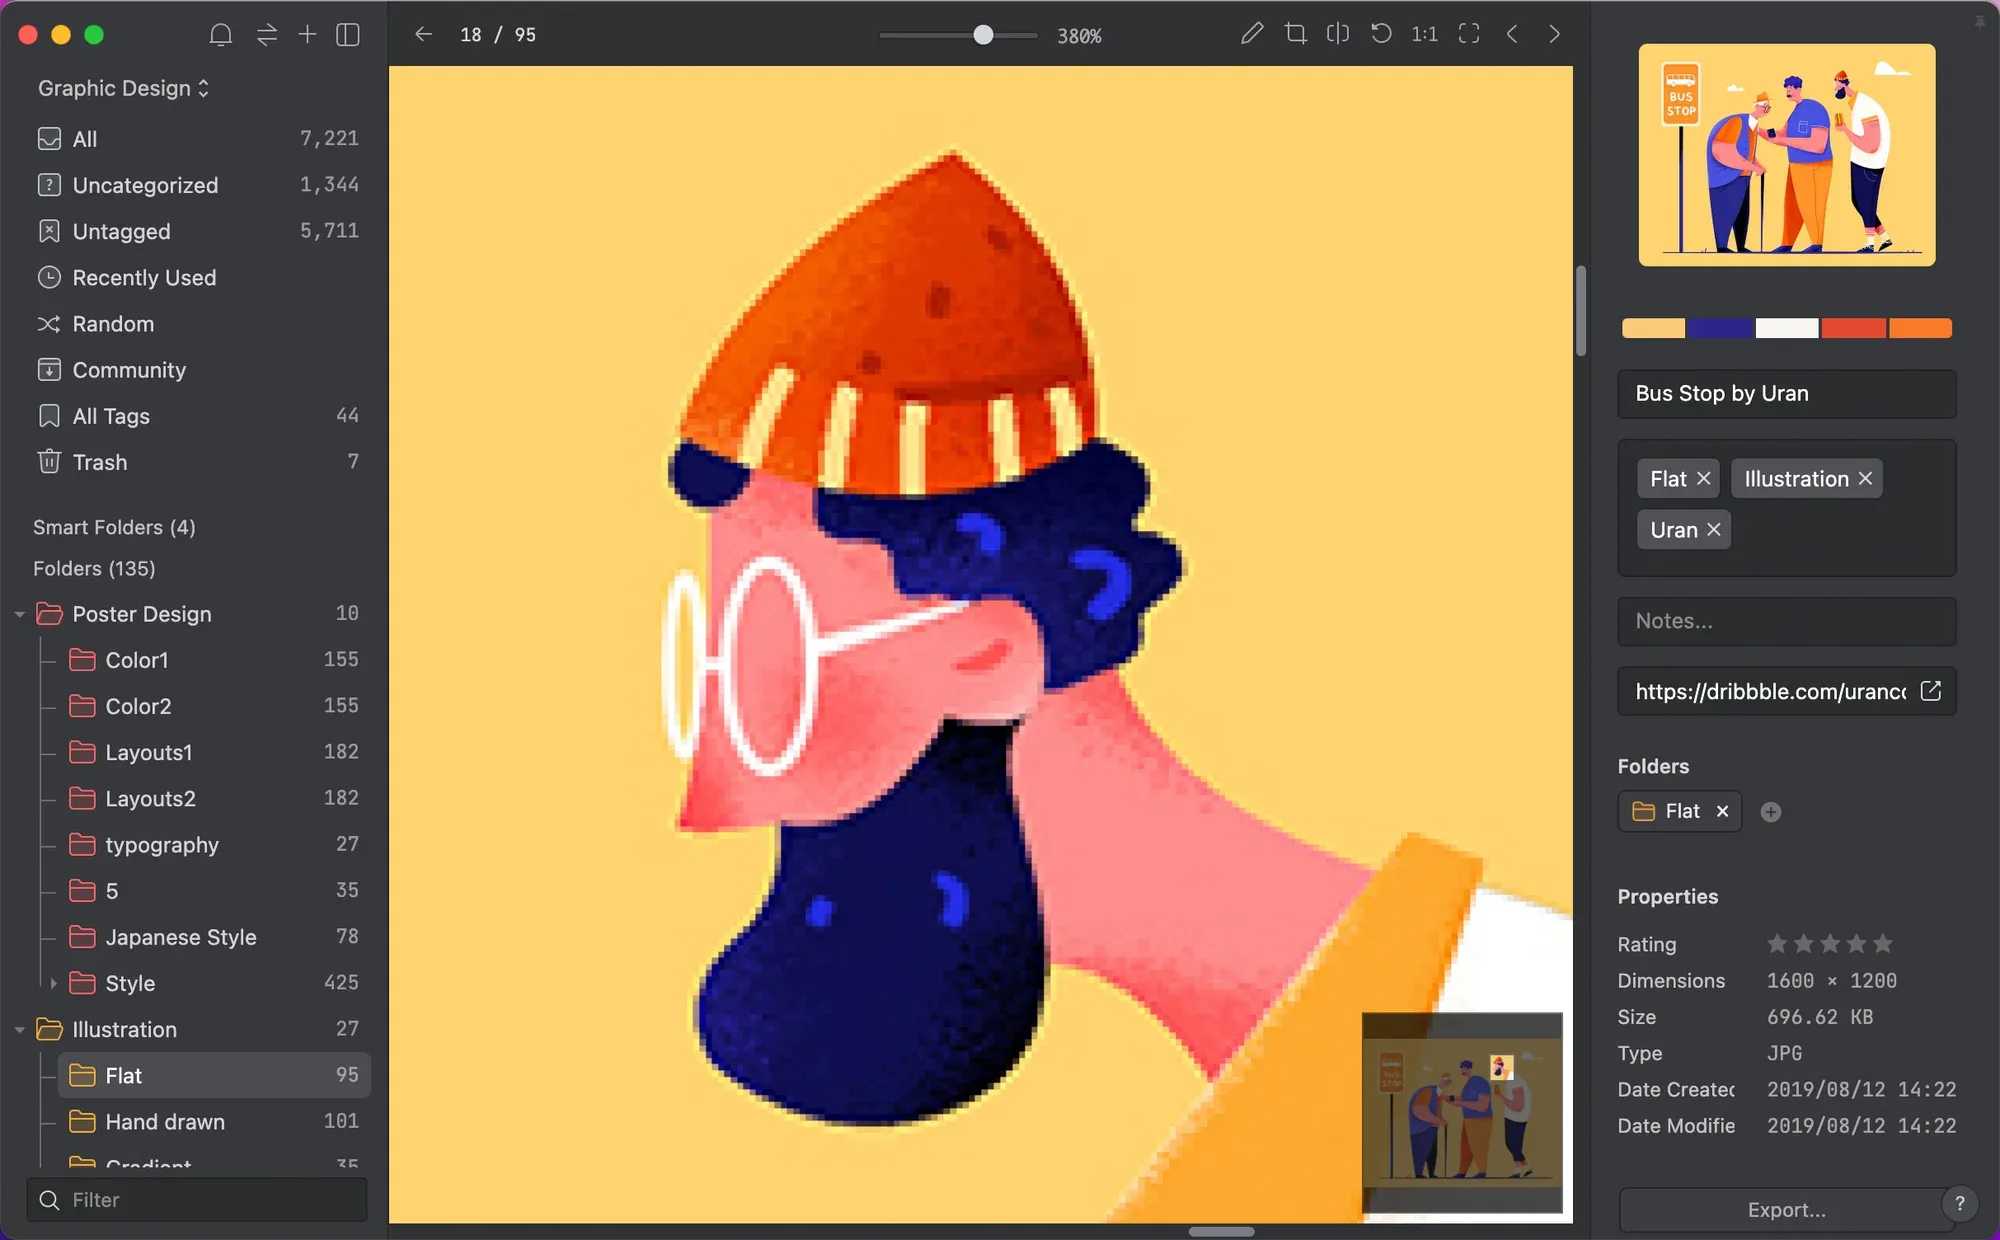
Generally, Eagle will try to make the edge of the picture smoother when you zoom in on details, but if you want to check the color details, you can check the “Pixelate” option here
Pixelated is not turned on
Enable Pixelated
2. Transparent grid background
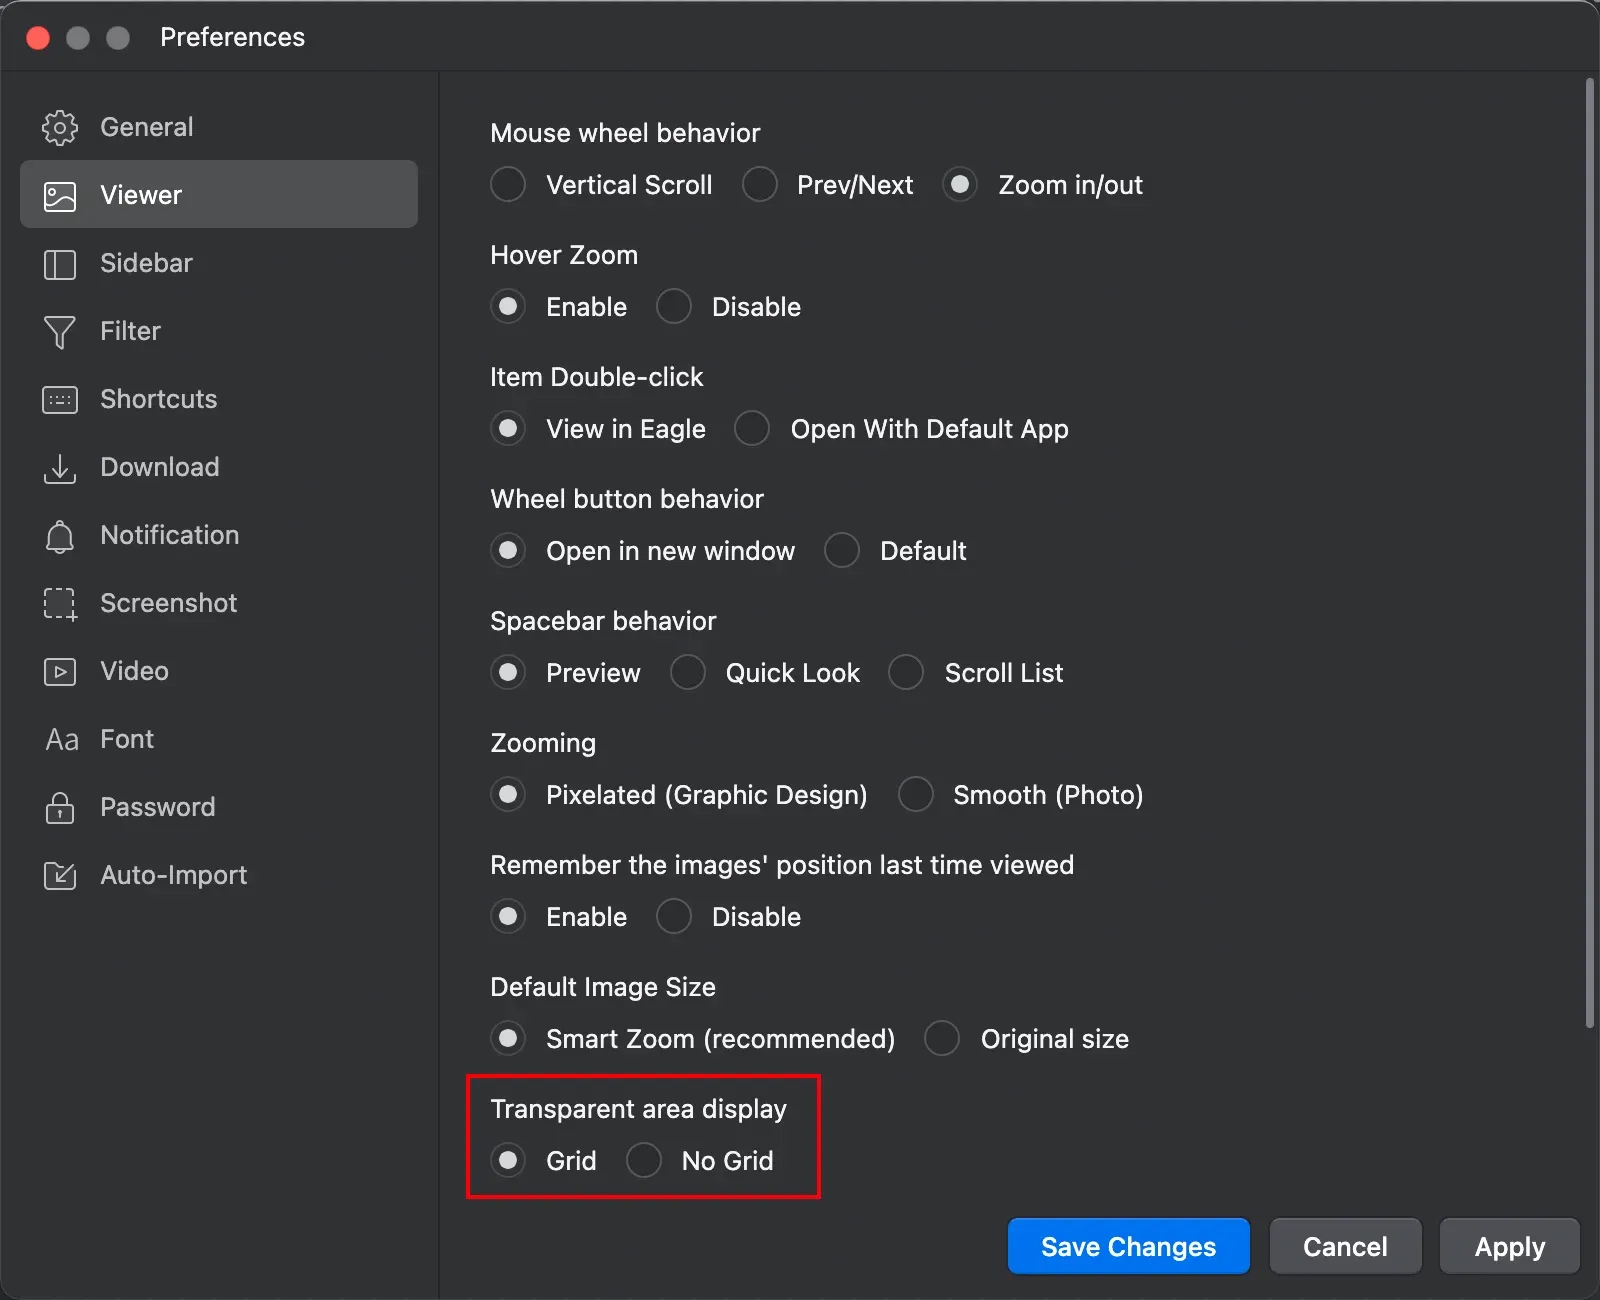
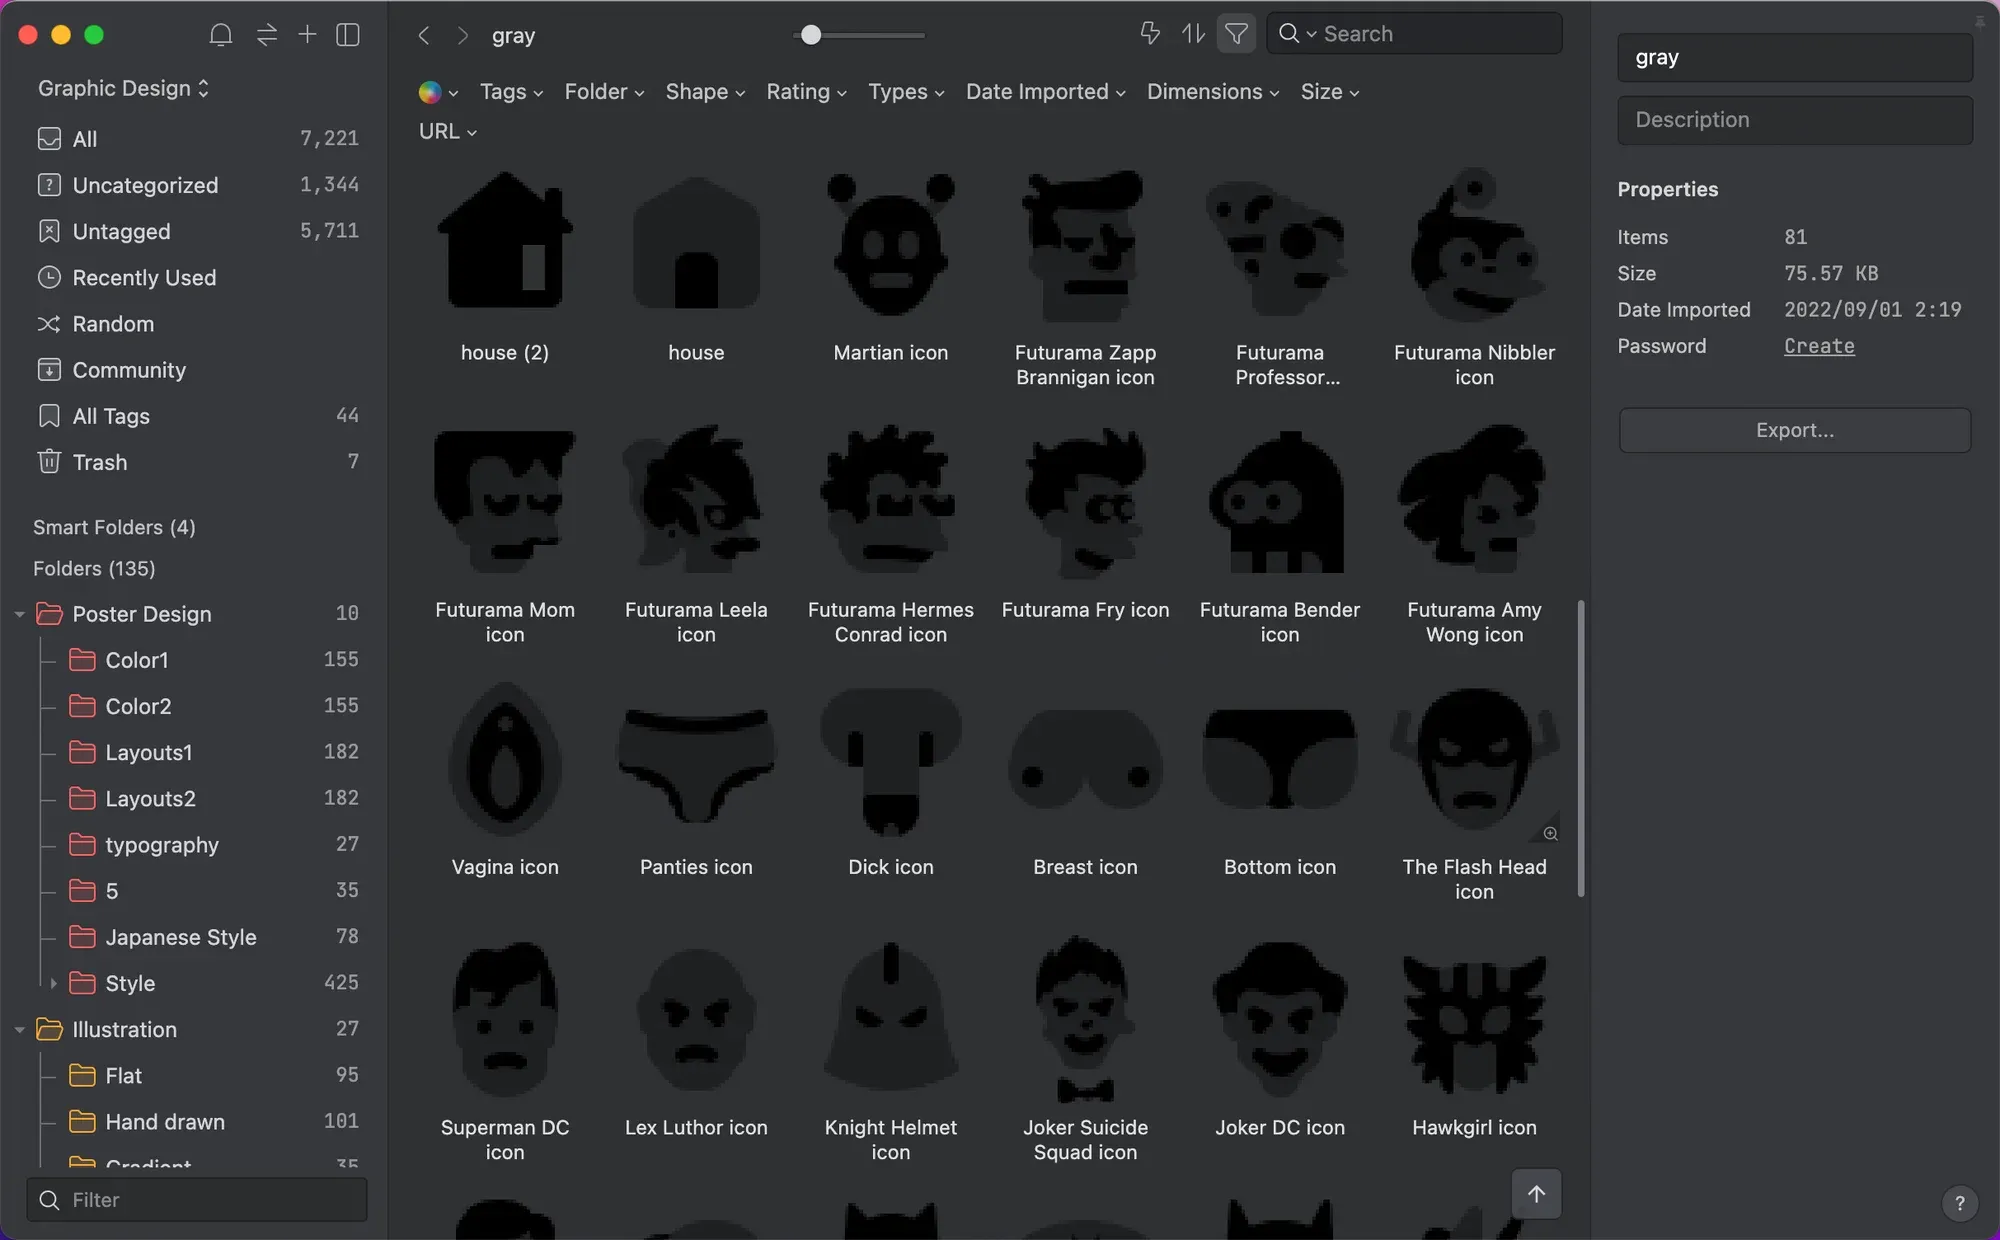
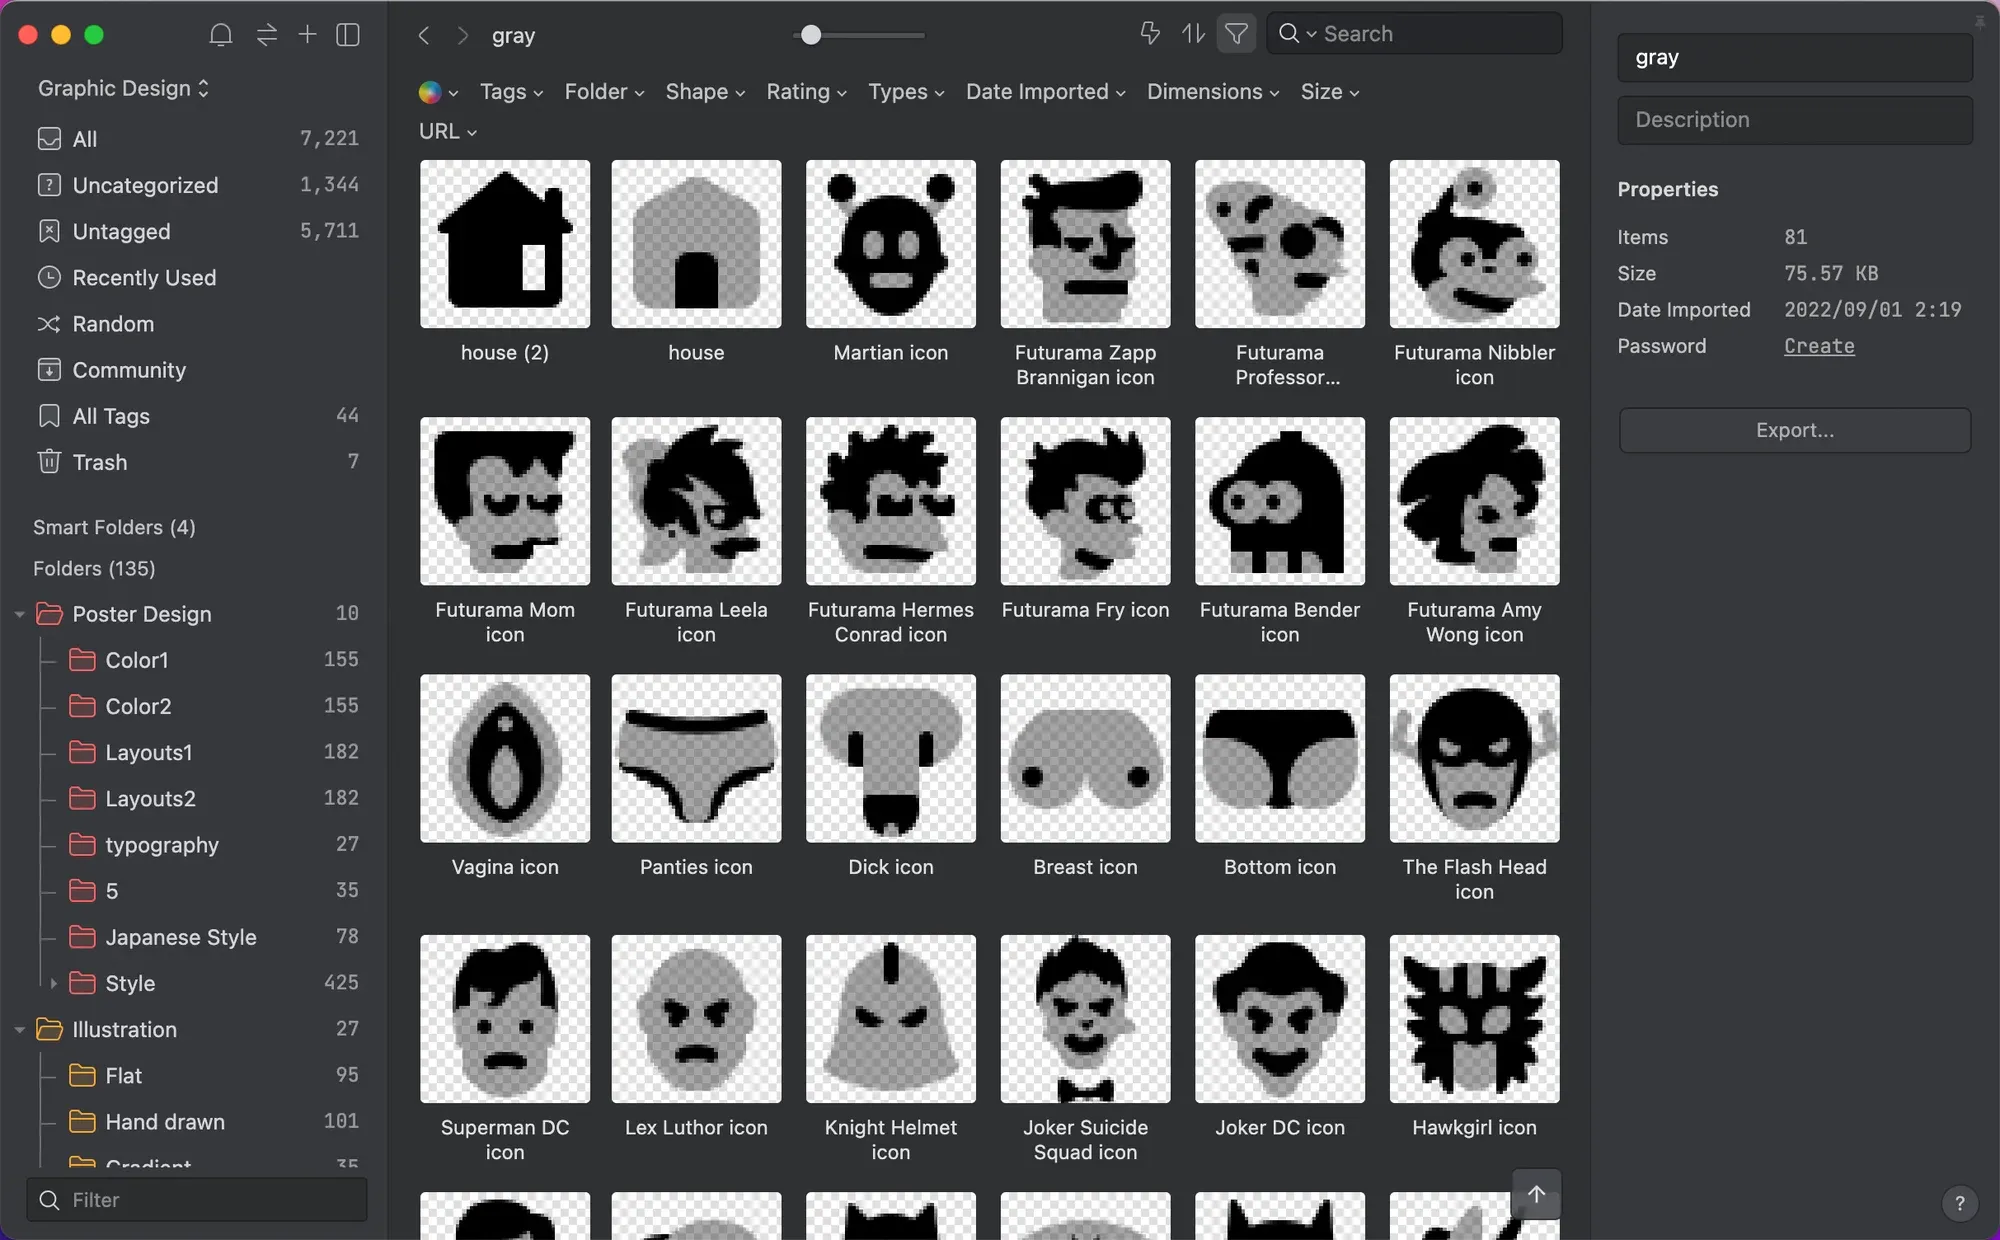
Some PNG image colors are very similar to Eagle's theme color, which may be difficult to view and manage. Therefore, select Grid in the “Transparent Area Display”, all your PNG images with transparent backgrounds will automatically add a gray and white grid, which will be very convenient while browsing.
Hide grid
Show grid
3. Default viewing ratio
When you click a picture, Eagle will automatically recognize the proportion of the picture and show it in the most suitable size on the screen.
For example, if you open a full-page picture on your computer, you need to manually zoom in to see the details.
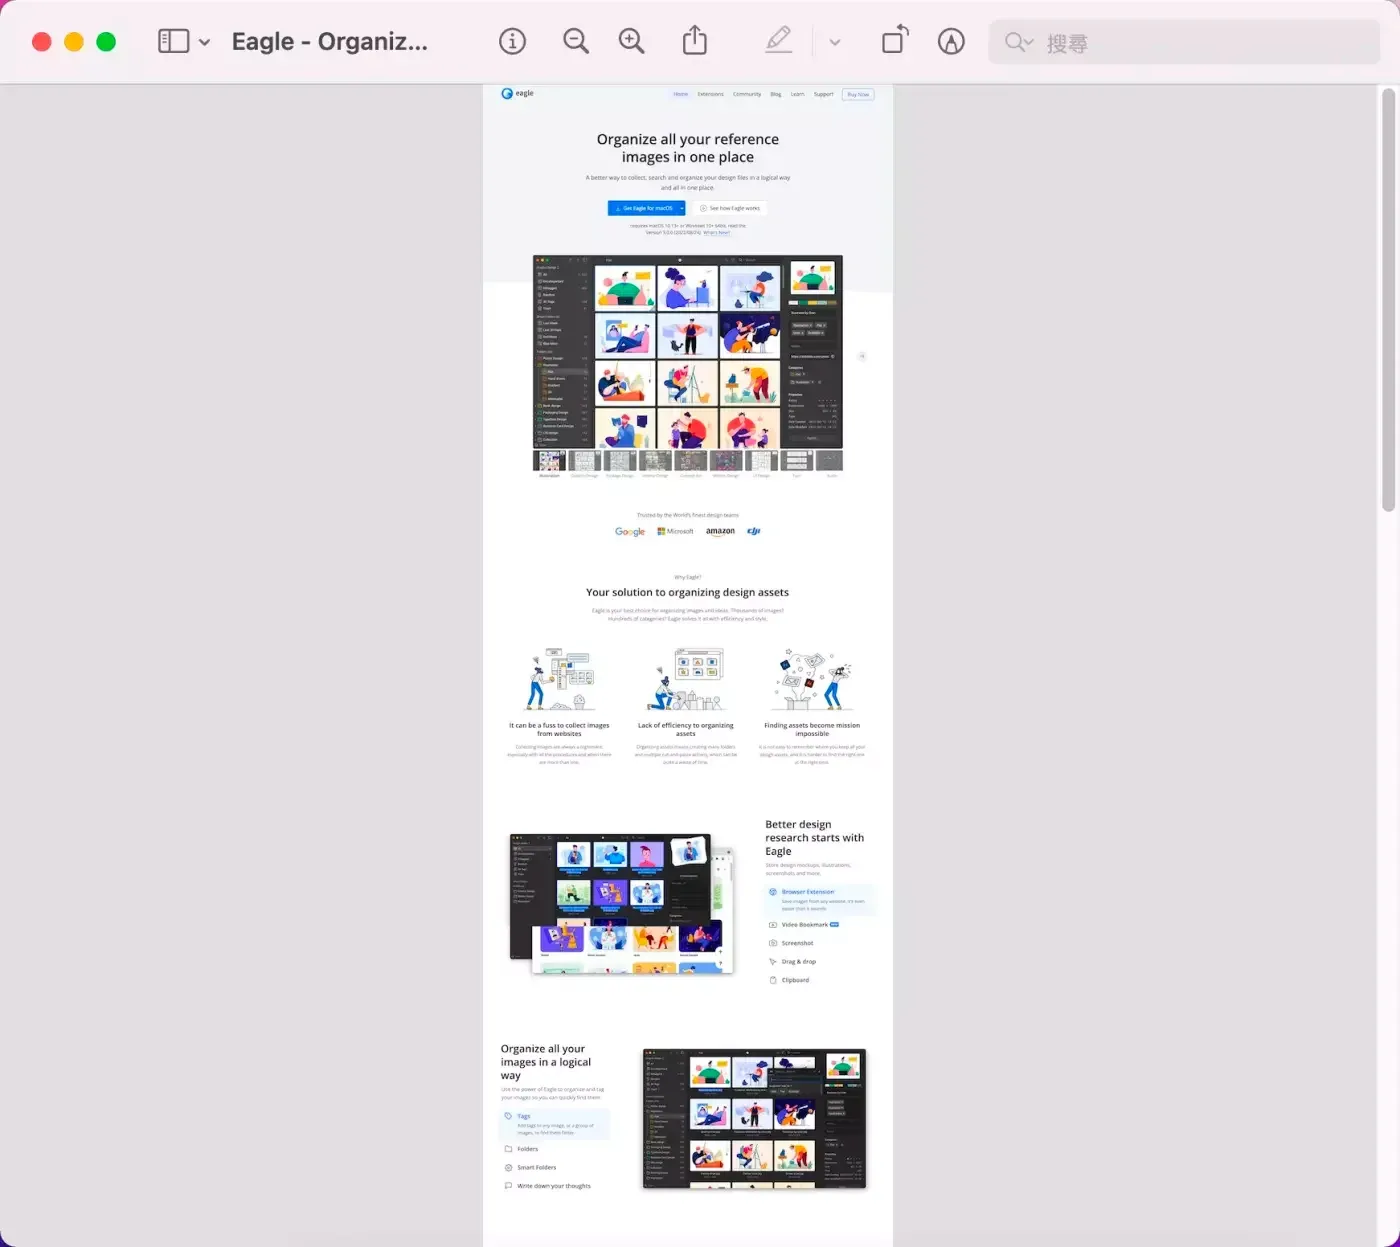
When you open a full-page image in Eagle, the system will automatically zoom in to a suitable viewing ratio for you, this helps you level up the image browsing experience.
Note: You can use the scroll wheel on your mouse to zoom in or out anywhere on the picture.
4. GIF enhancement
When you browse GIF animation in Eagle, you can view it frame by frame, so that you can refer to and learn the details of the design. Still, it can be quite tiring to click the view frame by frame setting manually in the upper right corner to activate this function every time.
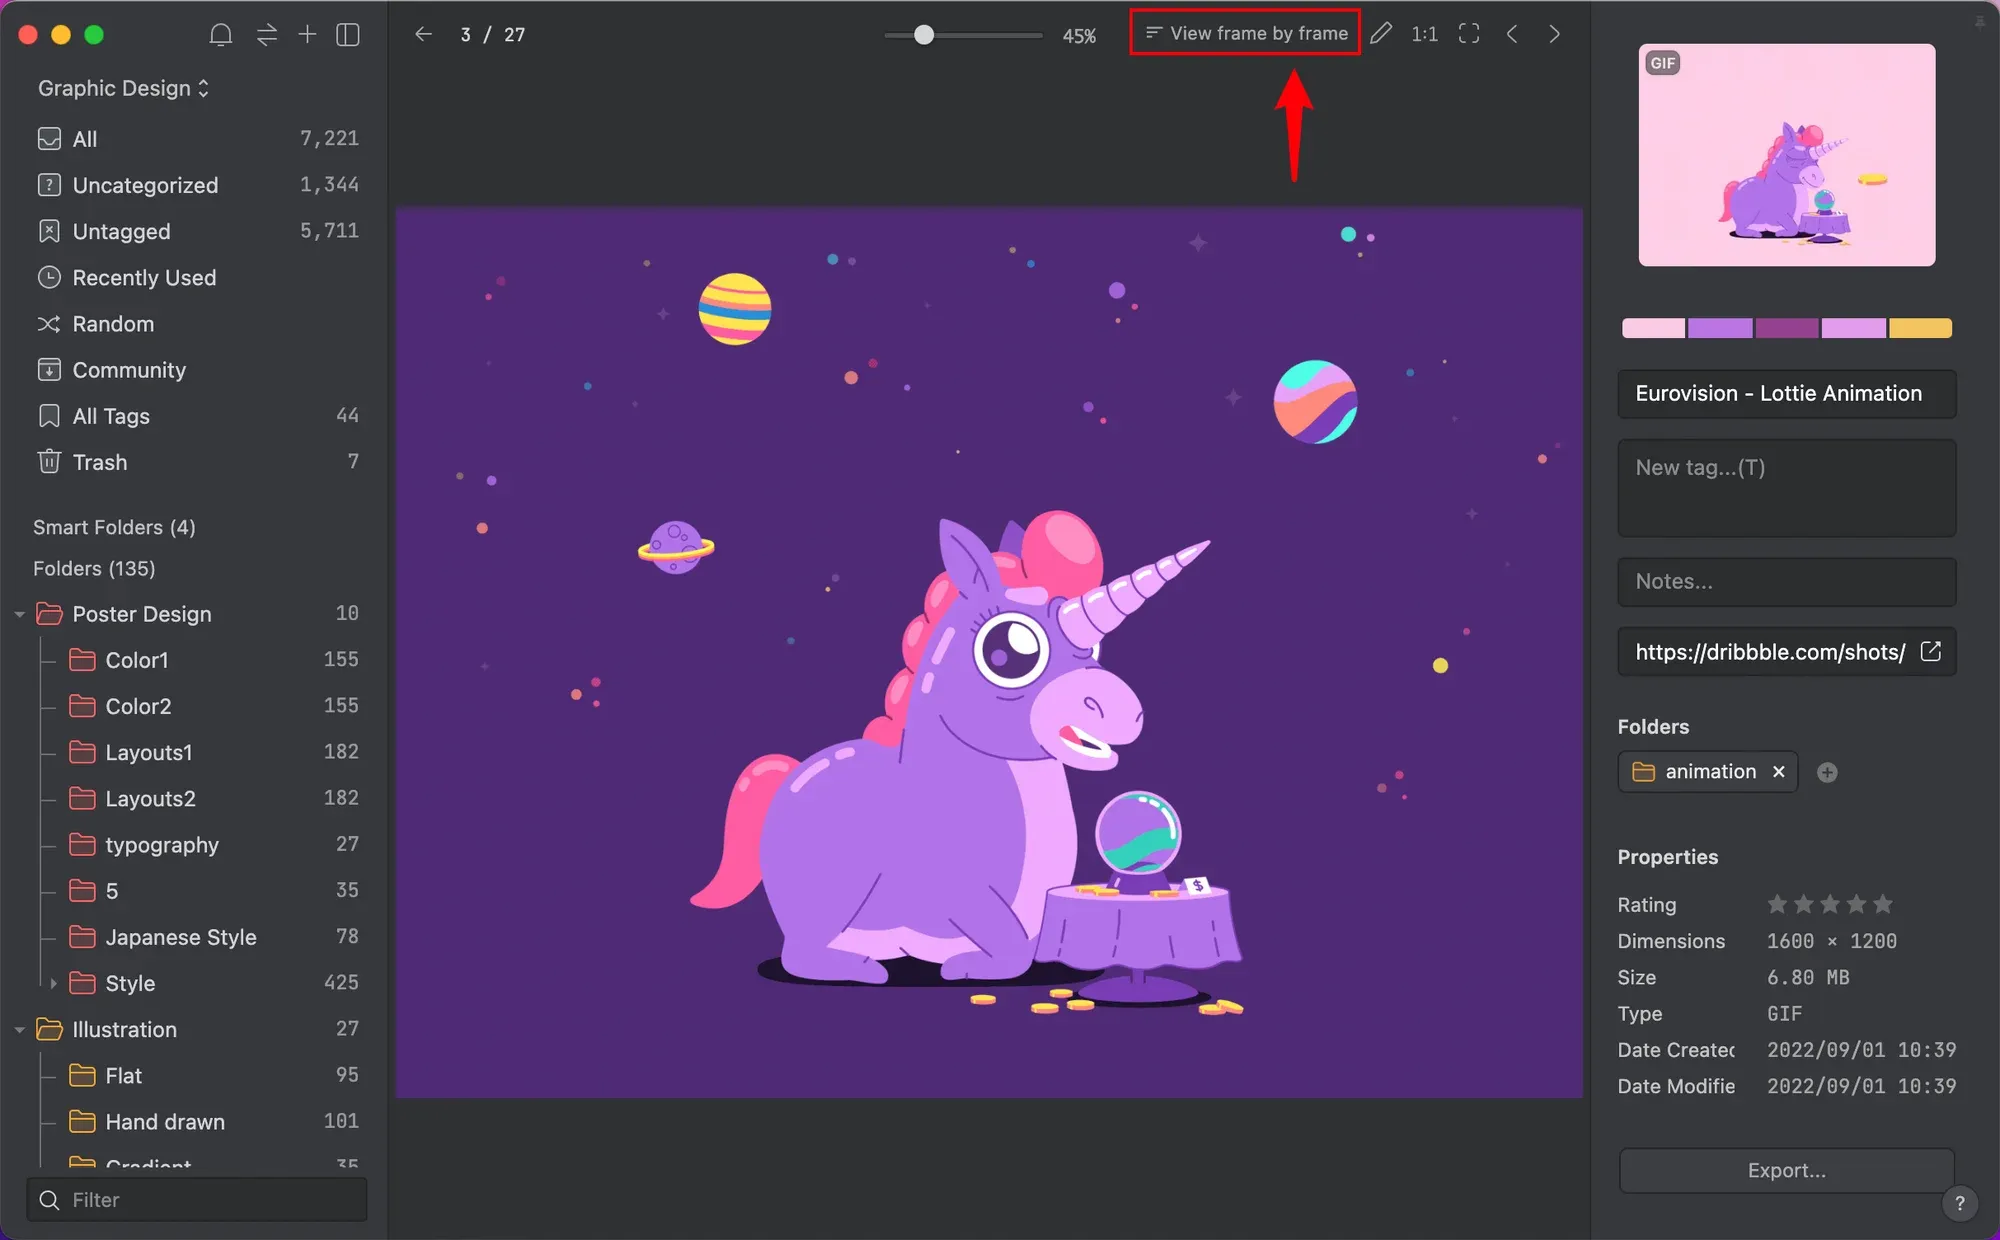
To make it works automatically, in Viewer setting, enable the Advanced GIF Vieweroption.
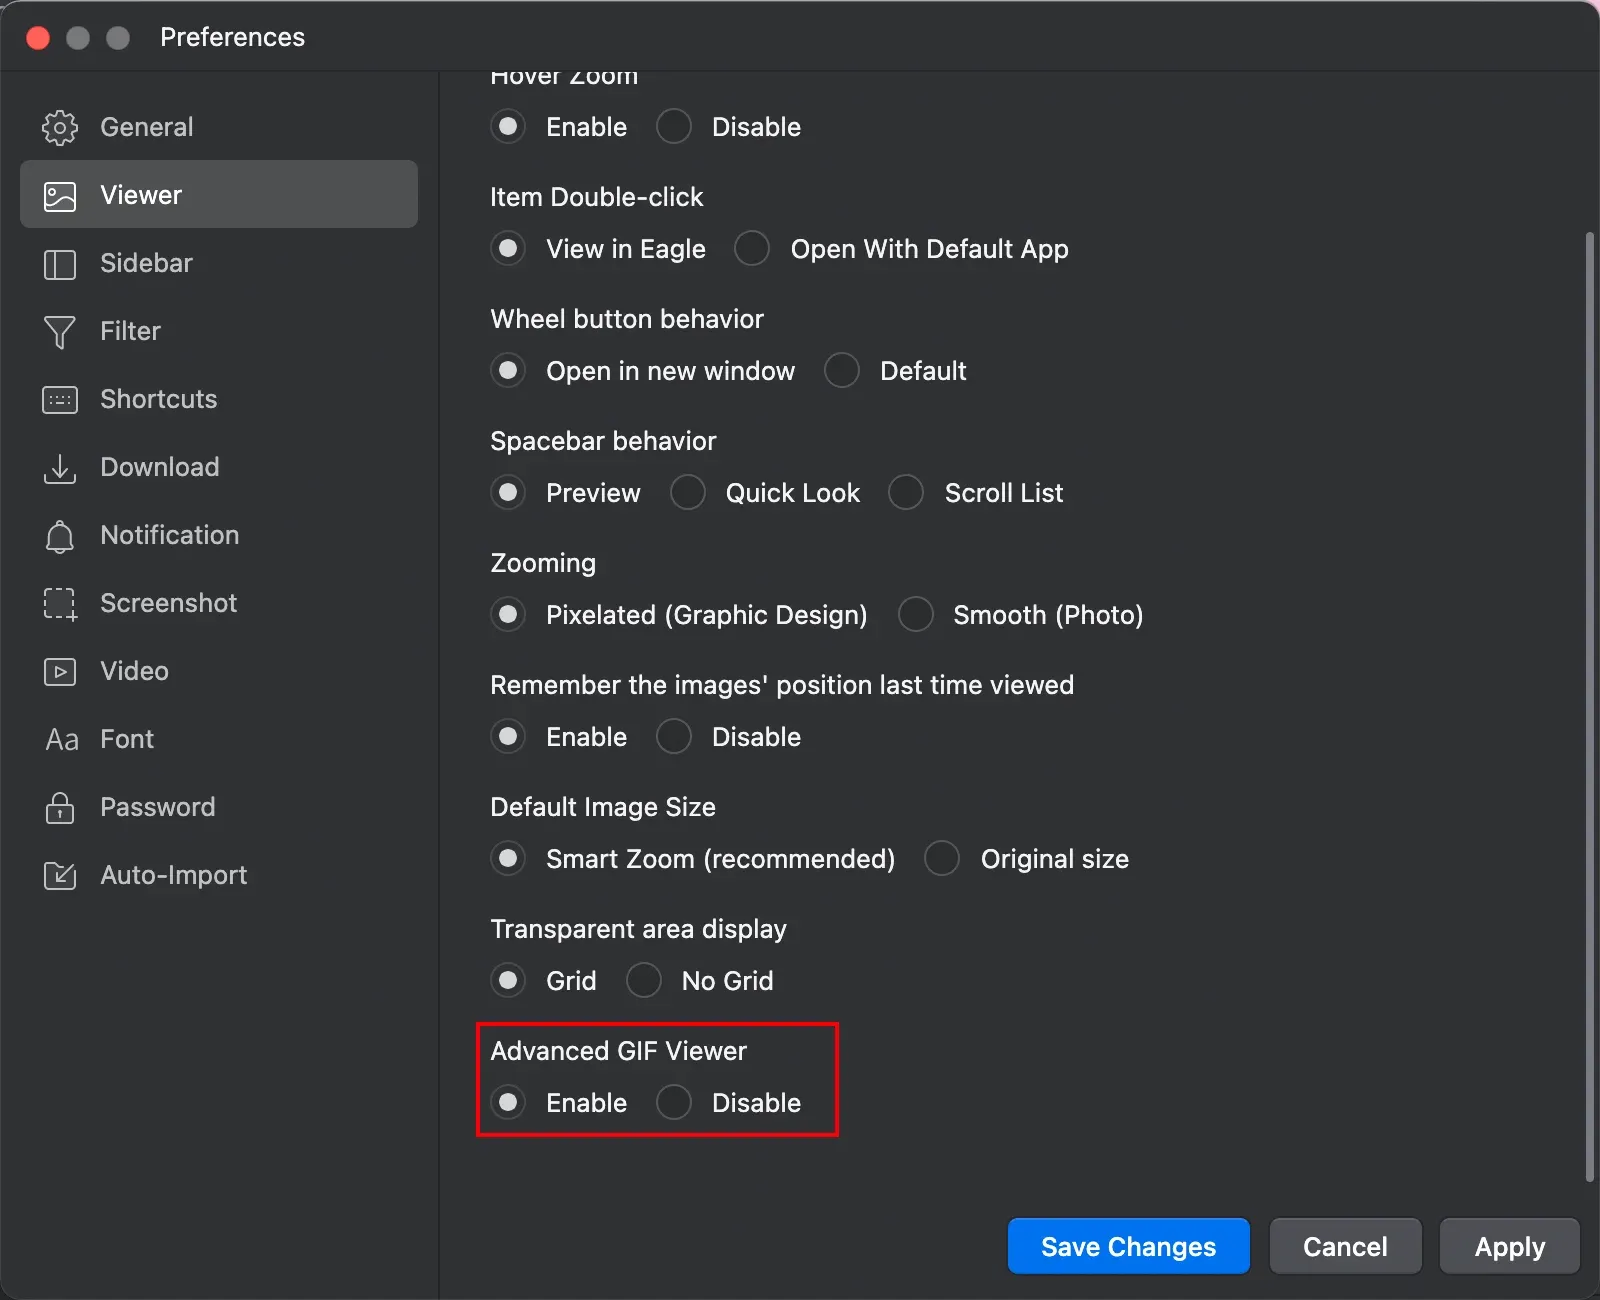
Now, when you click the image, you don't need to manually click “View Frame by Frame”, the system will automatically complete this step for you.
04 Sidebar
In the sidebar setting, other than adjusting the files displayed, you can also change the double-click action to “Rename”.
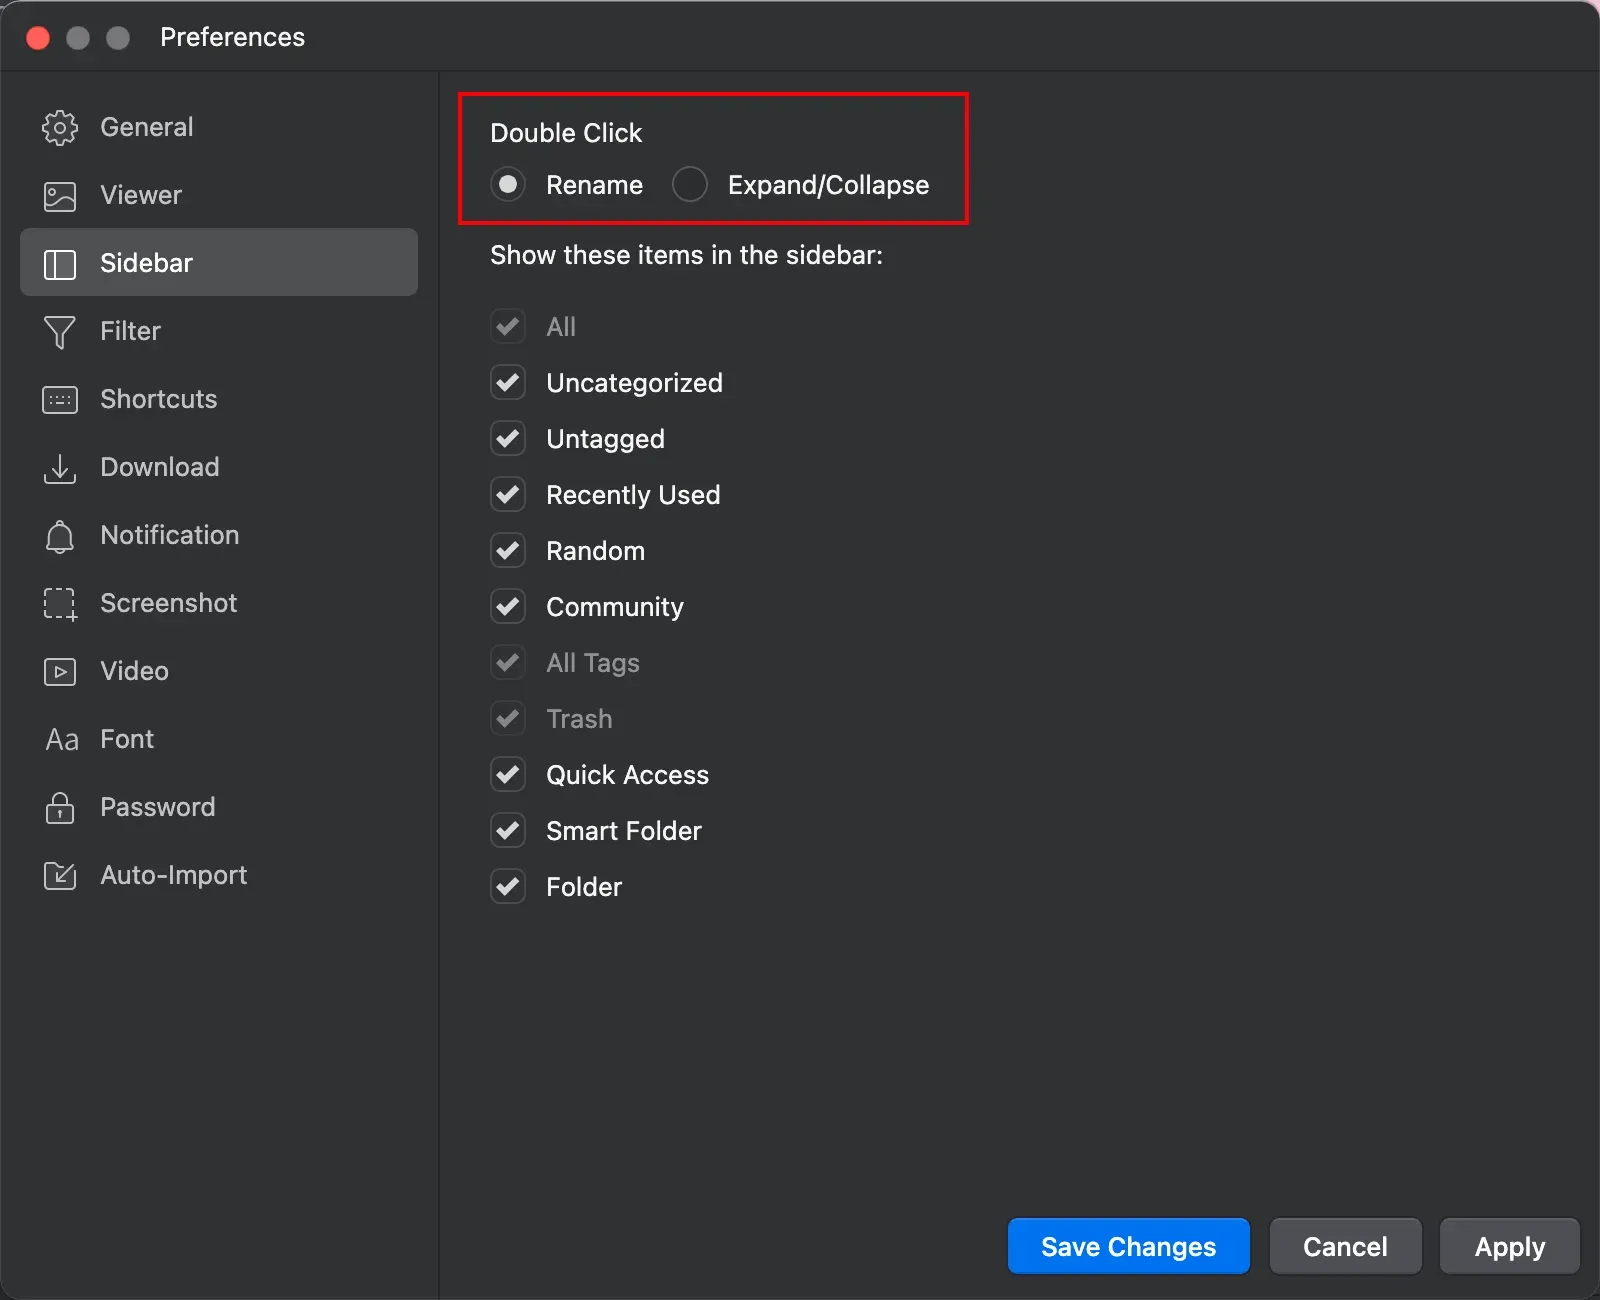
Double click to rename your files
05 Video setting
Generally, when the video is playing, scrolling the mouse wheel is to adjust the volume. In the video settings, you can change this action to adjust the progress bar of the video, which helps you view the video faster and more efficiently when you are dealing with hundreds or thousands of videos at the same time.
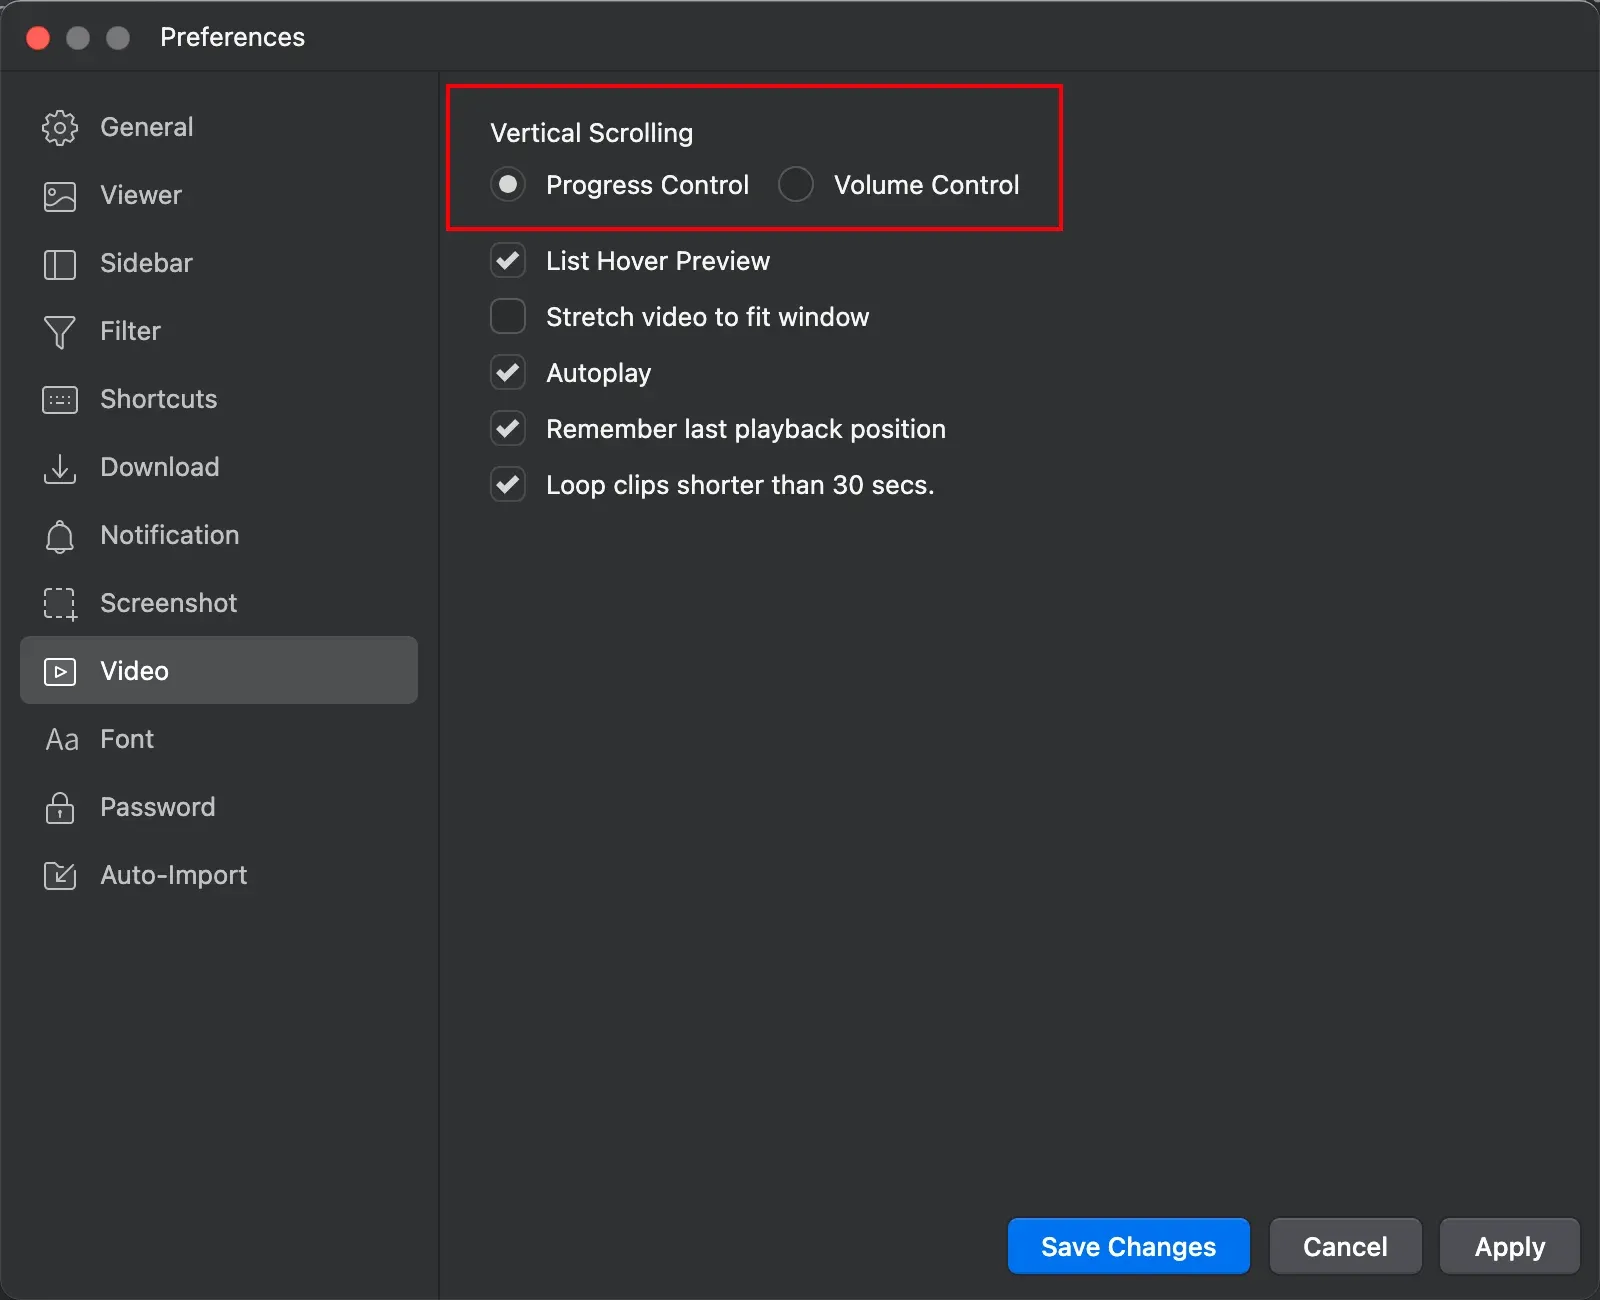
Of course, in terms of video previewing, Eagle can do more than that, such as:
Move the cursor left and right over the video to adjust the progress bar to quickly preview the video:
Adjusting the playback speed in the lower right corner:
Setting the playback area in the progress bar to watch the selected clips repeatedly:
Also, click on the lower right corner to add a video note. After creating notes, click the note on the right to jump to the marked area automatically, this will help you significantly to highlight the important part of the videos.
Note: video comments are also searchable on the Eagle search bar.
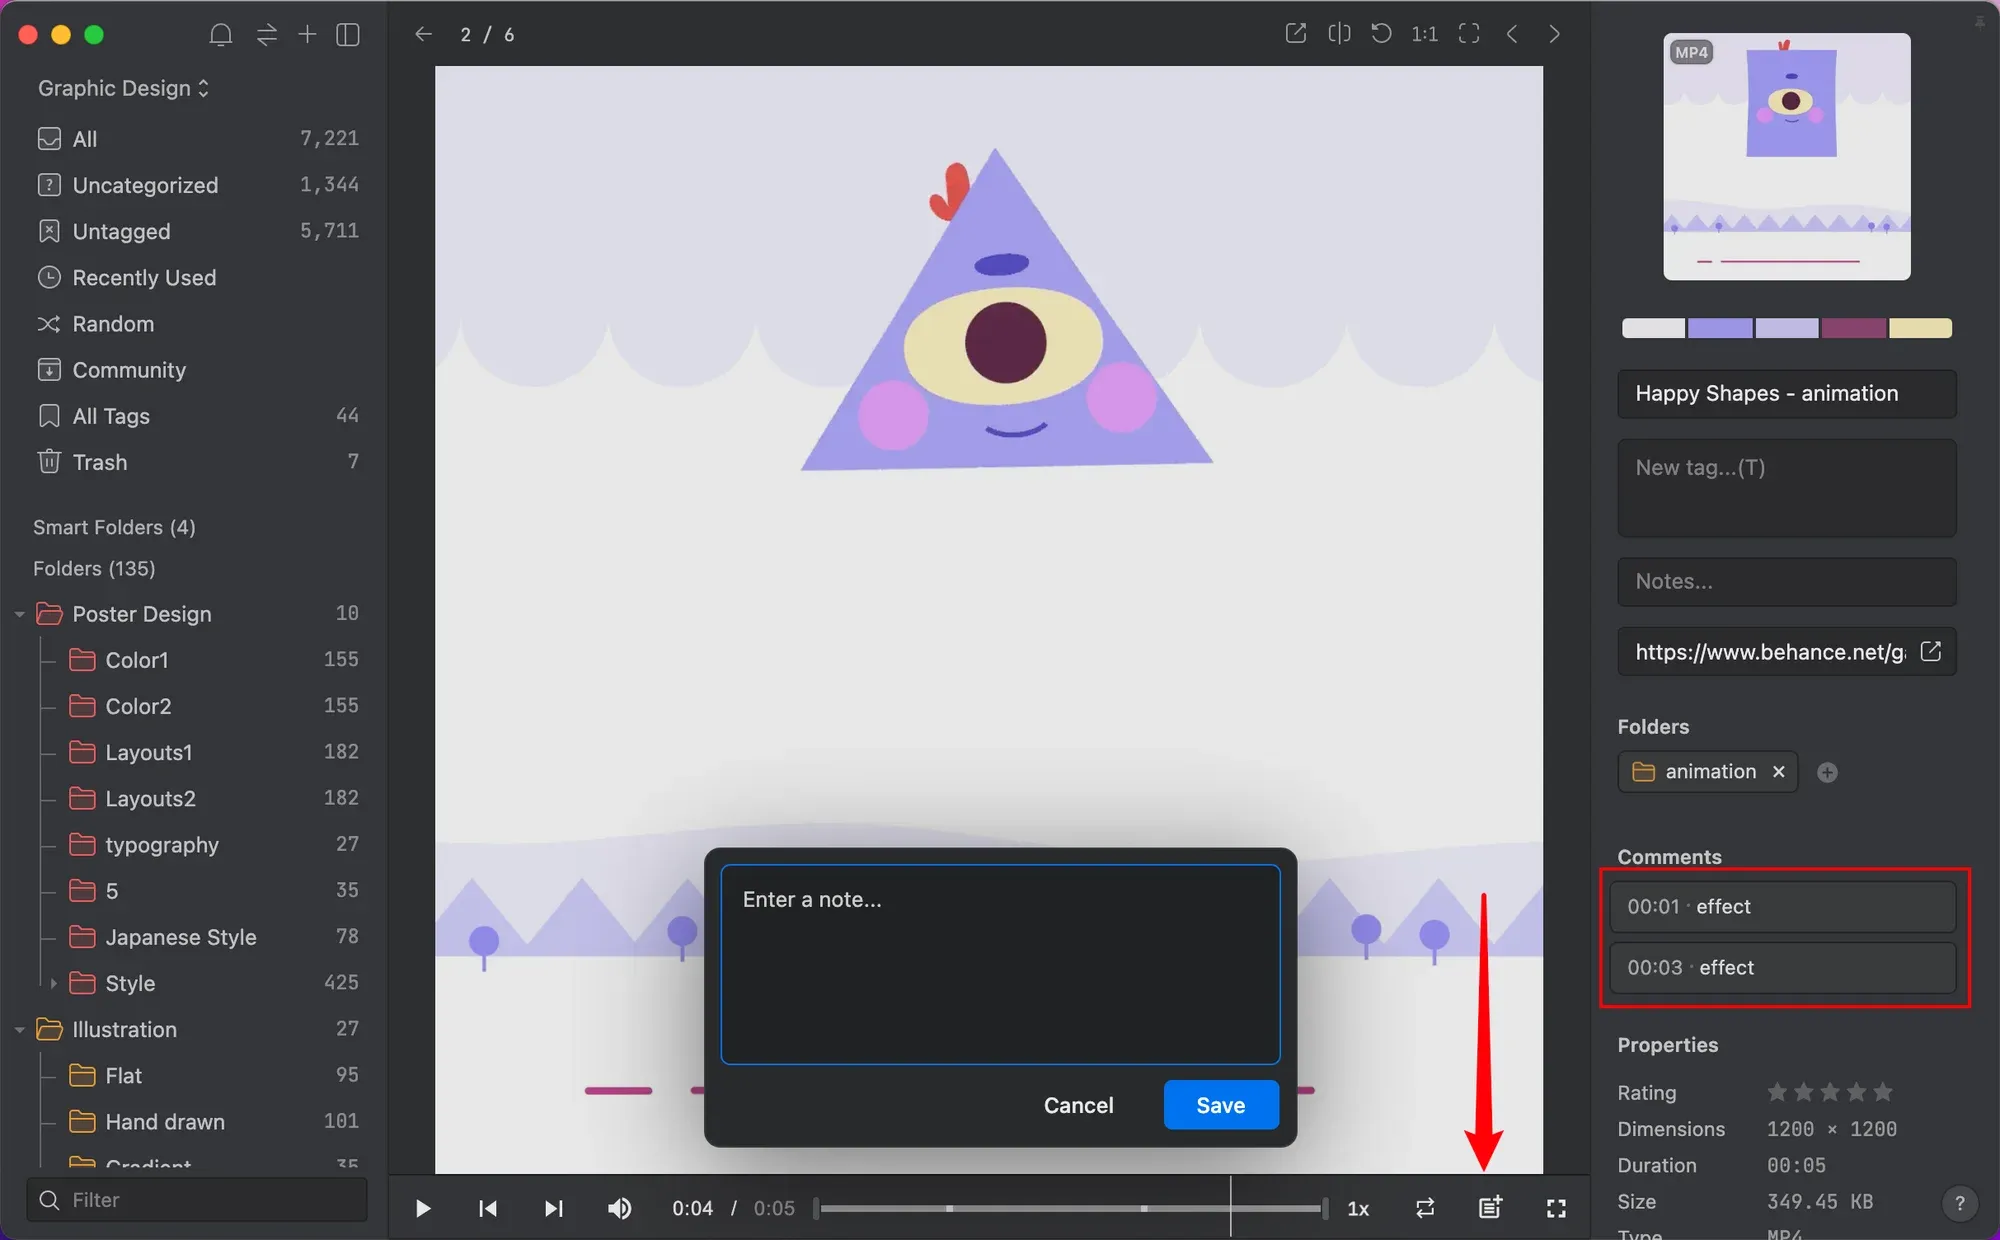
If the default thumbnail of the video is not suitable to your liking, then you can choose a frame and right-click - "Set as video thumbnail" to set a preferred thumbnail.
06 Download Settings
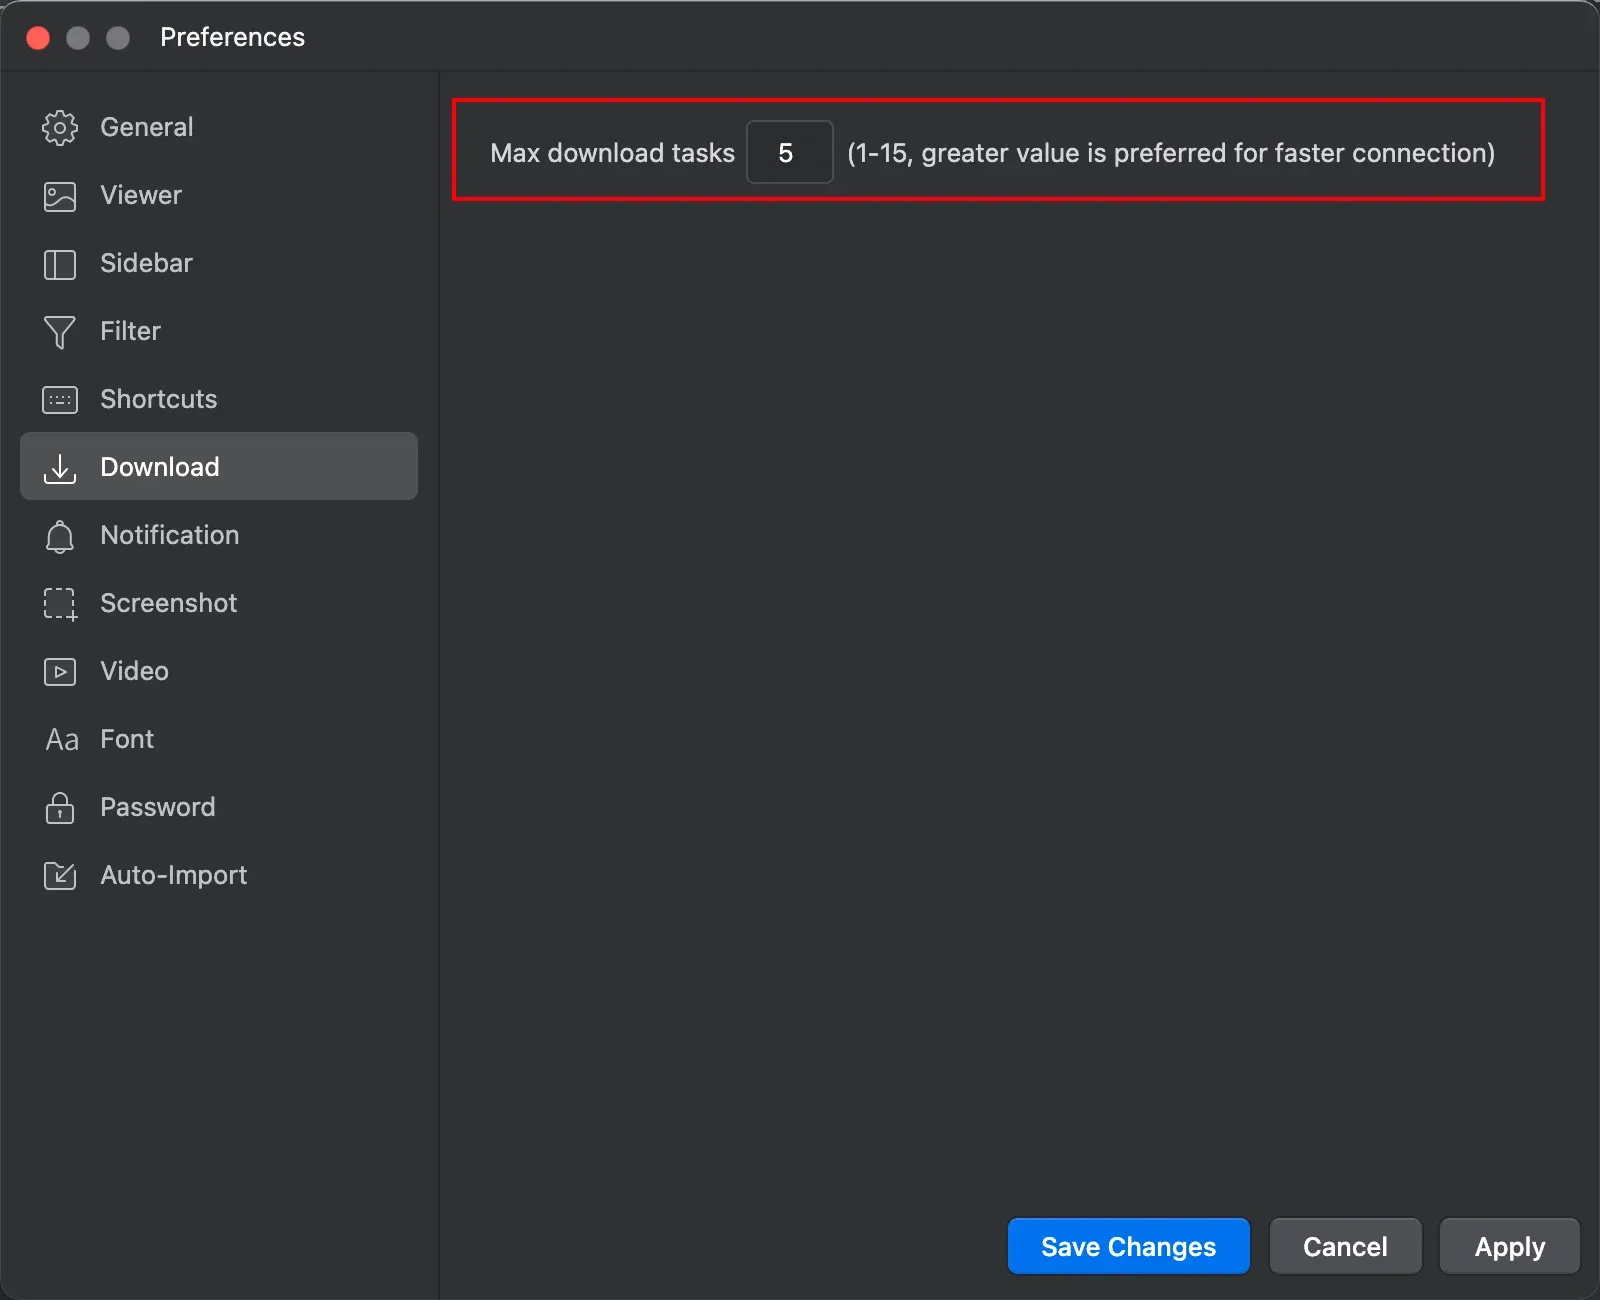
You can increase the maximum downloading task to speed up the efficiency of downloading pictures in batches.
07 Password Protection
You can set up a password to secure your Eagle library.
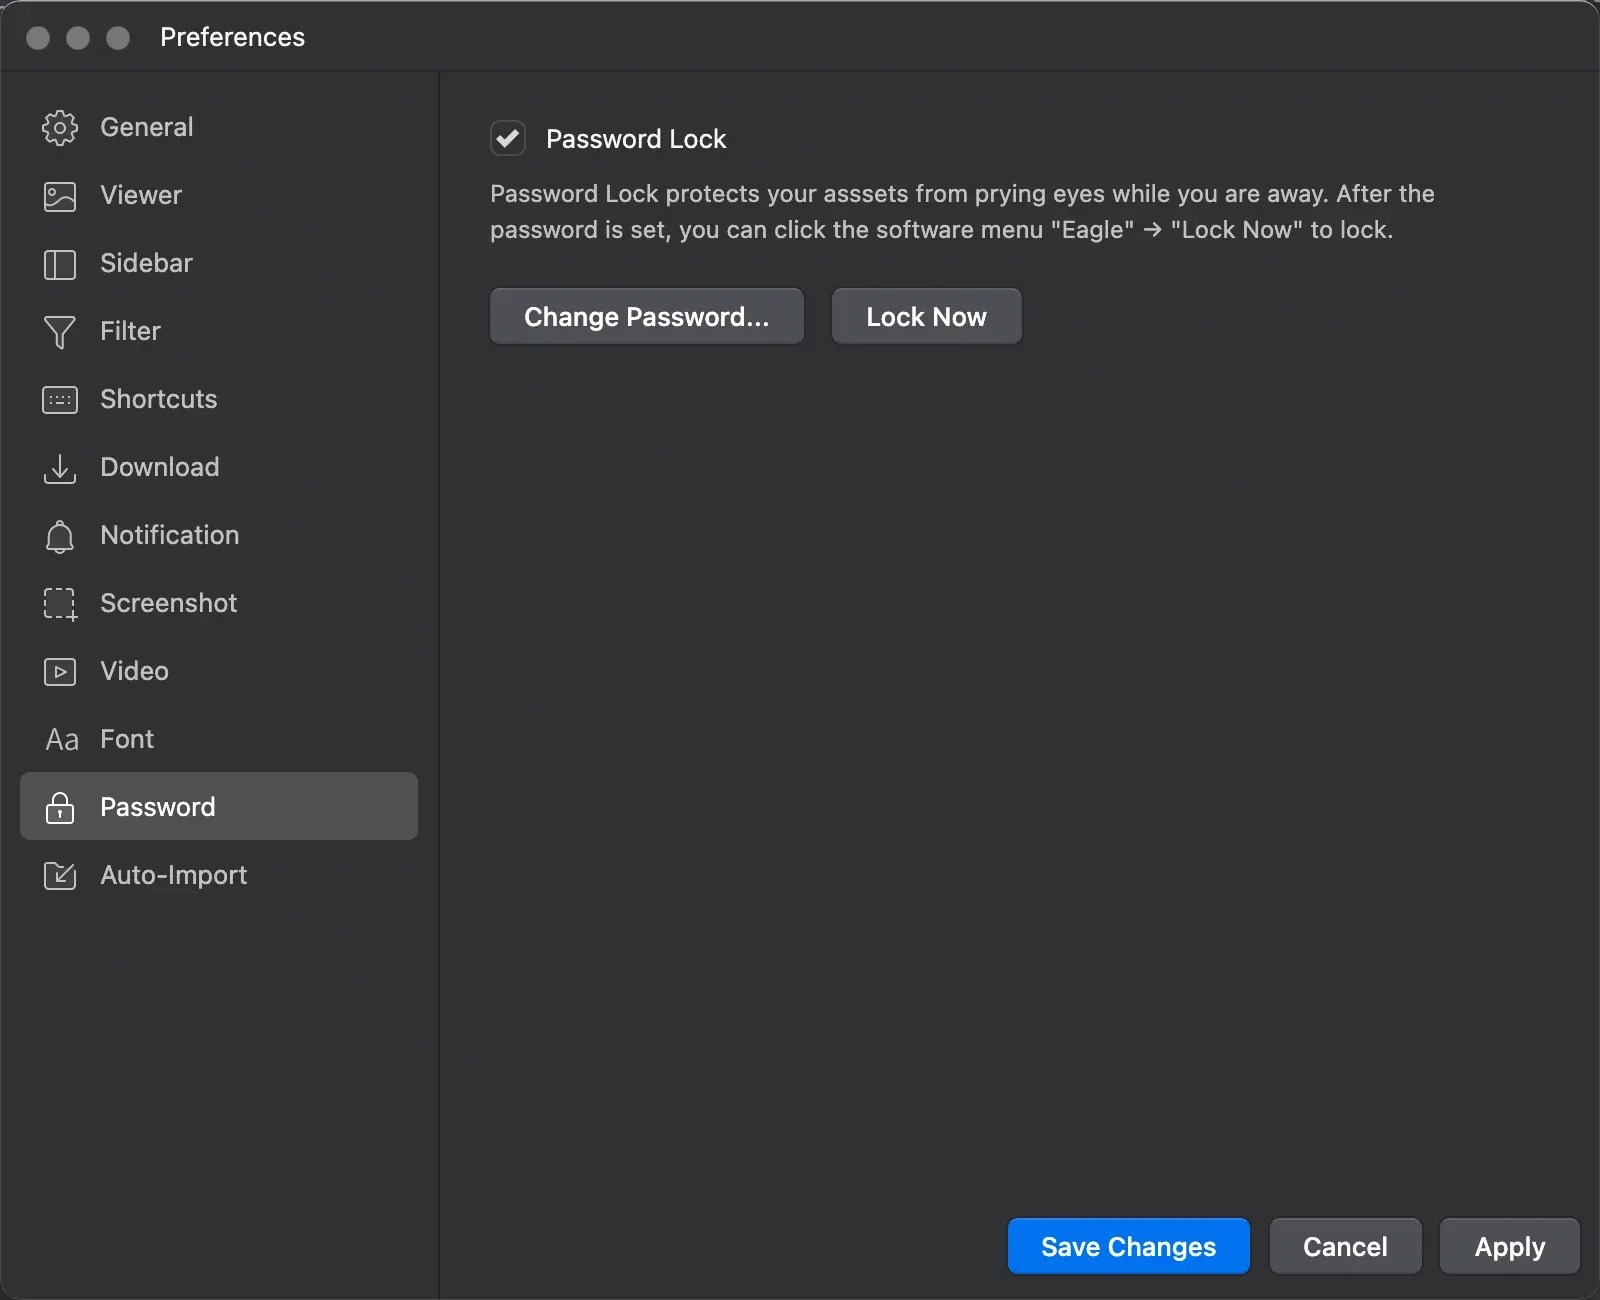
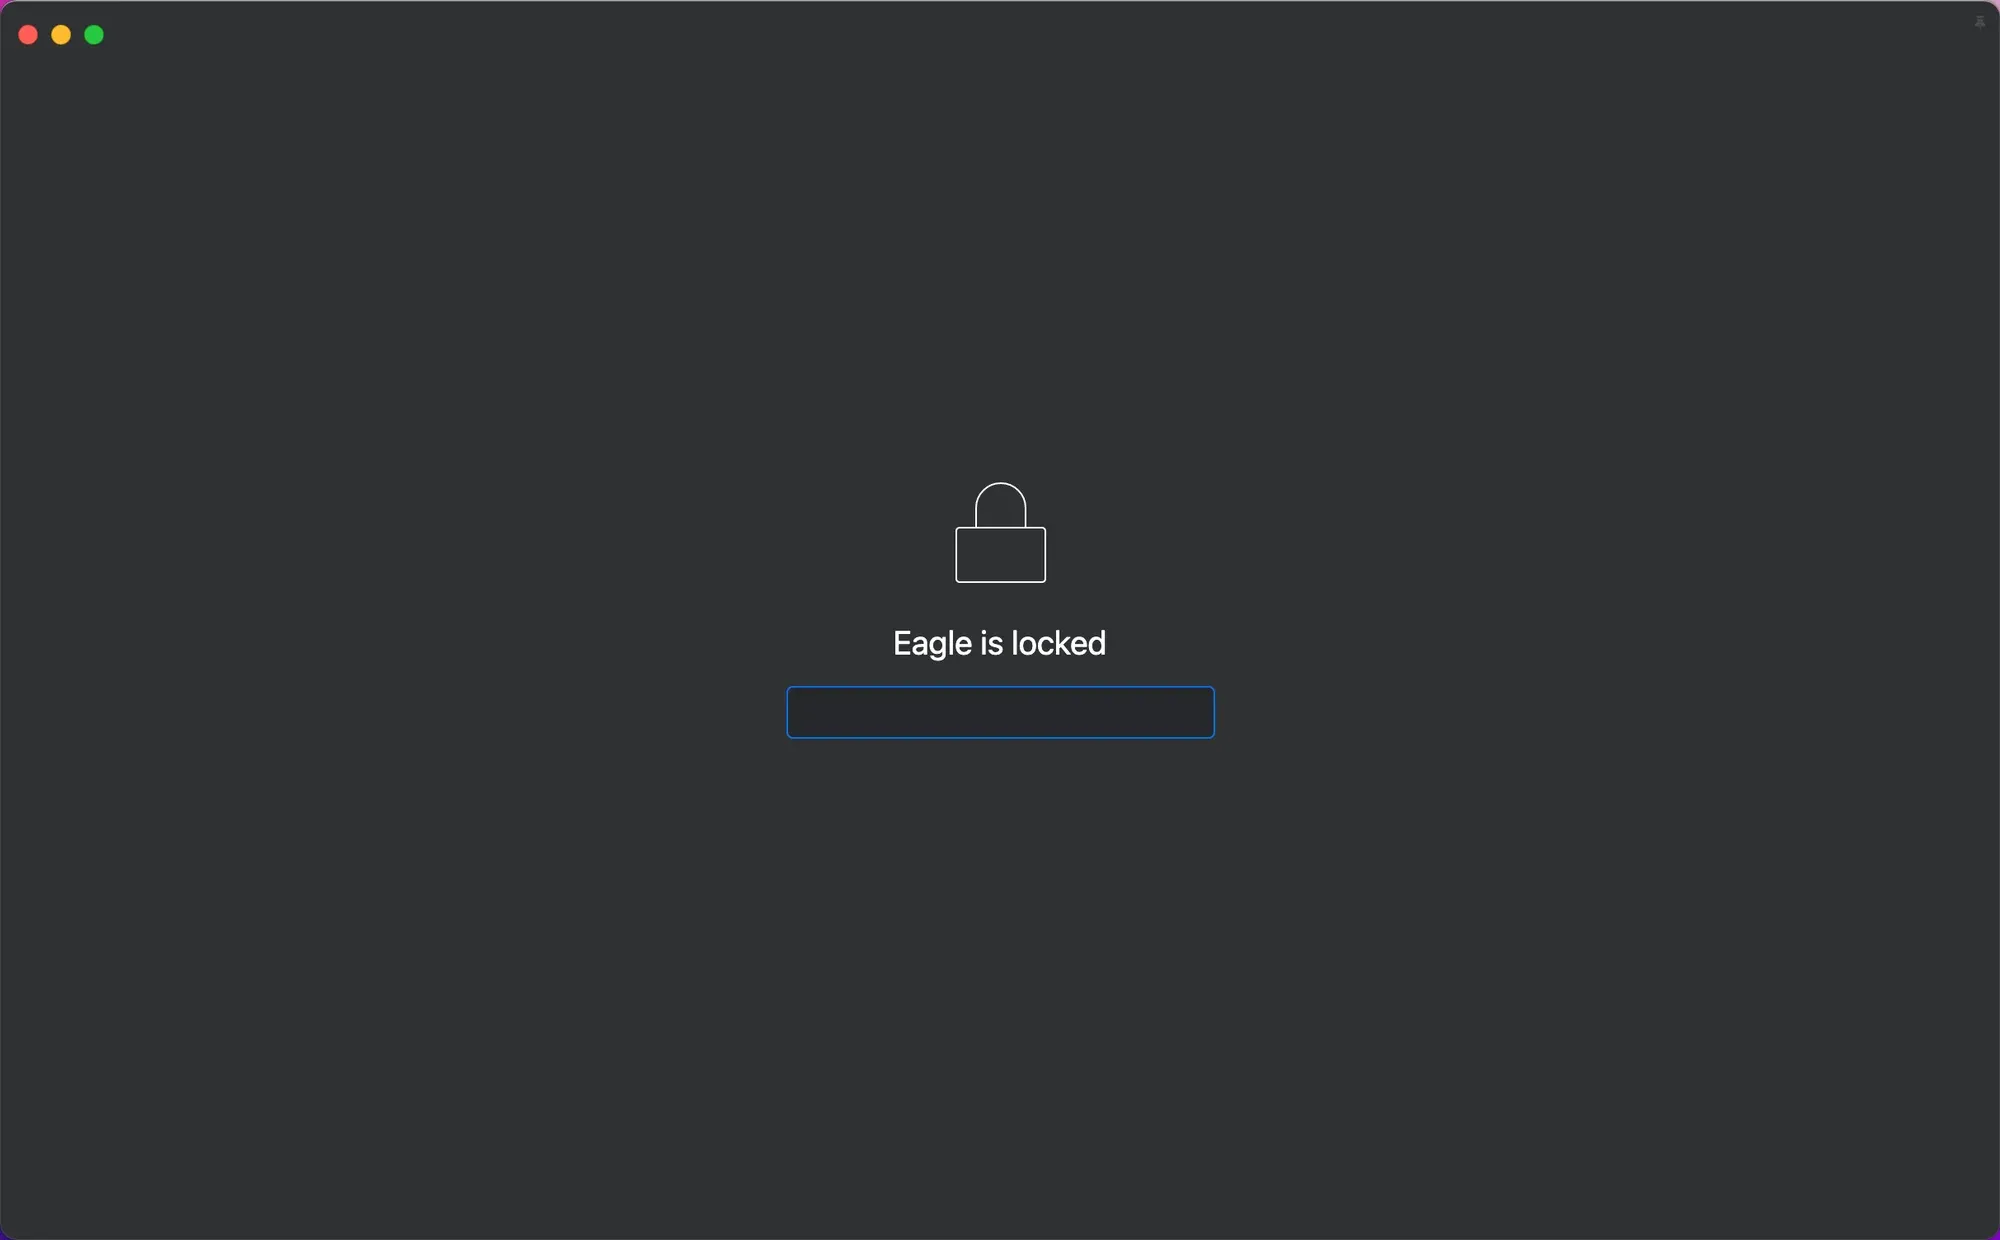
If you leave your computer temporarily and do not want others to see your Eagle library, select Password —> Lock Now to lock Eagle.
What do you think of these settings? Have you tried them all? Start customizing your Eagle with these settings now!


